glass jar filled with apple peels and cores submerged in liquid covered with muslin cloth for making apple cider vinegar from scraps

How to Make Apple Cider Vinegar from Scraps: The Complete Beginner’s Guide

glass jar filled with apple peels and cores submerged in liquid covered with muslin cloth for making apple cider vinegar from scraps

Every time you peel an apple or core one for a crumble you are throwing away something valuable.

Apple peels and cores contain wild yeast and natural sugars — exactly what you need to make raw, living apple cider vinegar at home. The kind that costs several pounds a bottle in health food shops. The kind with the mother. The kind that takes nothing more than apple scraps, water, sugar, and four to eight weeks of patience.
I started making my own apple cider vinegar after realising I was throwing away apple scraps every single week while simultaneously buying expensive bottles from the supermarket. The maths made no sense once I understood how simple the process actually is.
This guide will show you exactly how to make apple cider vinegar from scraps at home — no special equipment, no experience required, and almost zero cost.

In this guide you will learn:

  • What apple cider vinegar actually is and how it forms
  • What scraps you can and cannot use
  • The exact equipment you need
  • Step by step instructions from scraps to finished vinegar
  • How to know when your vinegar is ready
  • How to use and store your finished apple cider vinegar
  • Troubleshooting common problems
  • Let's make something.

What Is Apple Cider Vinegar and How Does It Form?

glass jar of golden homemade apple cider vinegar with visible mother floating near the surface

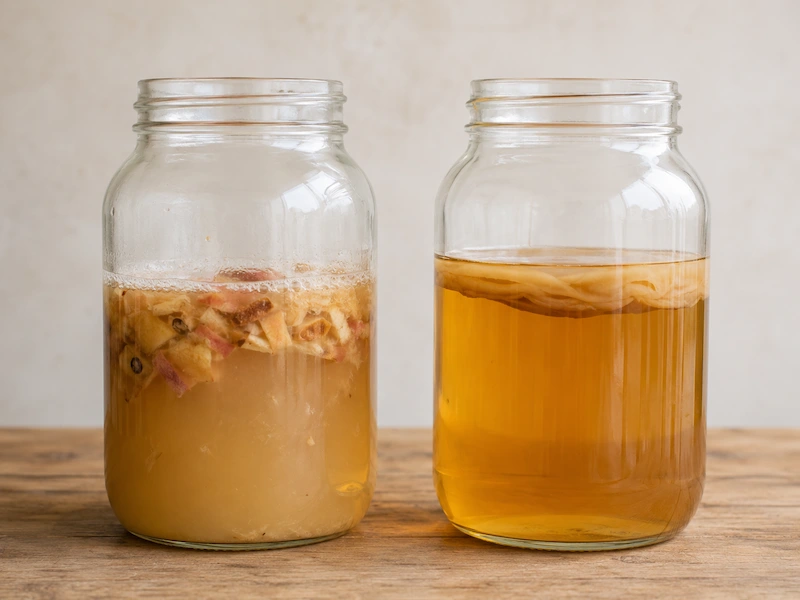
Apple cider vinegar is made through a two-stage fermentation process.
In the first stage wild yeasts — present naturally on apple skins and in the air around you — consume the sugars in the apple scraps and liquid, converting them into alcohol. This produces a rough, slightly fizzy apple wine.
In the second stage a group of bacteria called acetobacter convert that alcohol into acetic acid — the compound that gives vinegar its distinctive sharp flavour and preserving properties. This second stage requires oxygen, which is why apple cider vinegar is made in open containers rather than sealed ones.
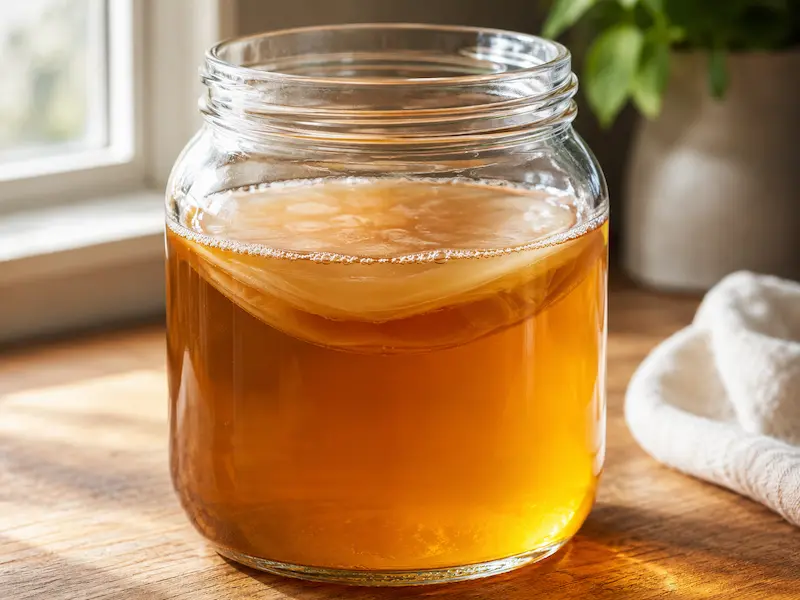
The cloudy substance that forms on the surface during the second stage is called the mother — a colony of beneficial bacteria and cellulose that signals your vinegar is alive and actively fermenting. Raw apple cider vinegar with the mother is considered far more beneficial than pasteurised commercial versions because it retains all the live cultures.
Making vinegar from scraps rather than whole apples works because the peels and cores contain the highest concentration of wild yeast and pectin of any part of the apple. You are not using a lesser ingredient — you are using the most fermentation-friendly part.

What Scraps You Can Use

  • Apple peels — from any variety of apple
  • Apple cores — with or without seeds
  • Apple halves or quarters that are slightly past their best
  • Bruised apple pieces with the damaged parts cut away
  • A mix of different apple varieties — actually produces more complex flavour

What Scraps to Avoid

  • Mouldy or rotting apple pieces — mould will contaminate the whole batch
  • Apple scraps that have been treated with bleach or strong cleaning products
  • Very old dried out scraps with no moisture left

A note on organic versus conventional apples: organic apple scraps are preferable because they carry more wild yeast on the skin and have not been treated with fungicides that can inhibit fermentation. However conventional apple scraps work perfectly well in practice — simply rinse them well before using.

What You Need

apple cider vinegar from scraps equipment flat lay including glass jar apple peels sugar muslin cloth rubber band and wooden spoon

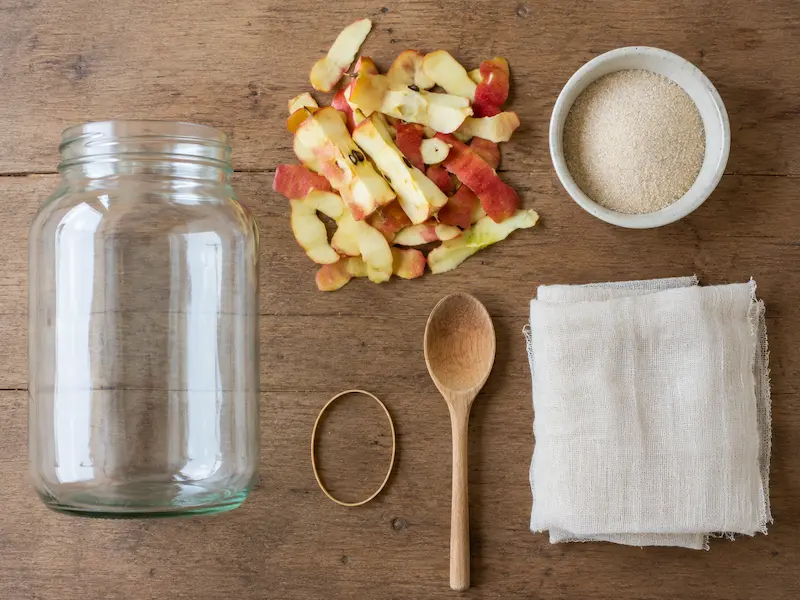
The equipment list for making apple cider vinegar from scraps is genuinely minimal.

A large wide mouth glass jar — at least one litre capacity. Wide mouth jars are preferable because they allow more oxygen exposure during the second fermentation stage. A clean recycled jar works perfectly — you do not need to buy anything special.
Muslin cloth or a clean tea towel — used to cover the jar. This allows airflow while keeping dust and insects out. Never use a lid with a tight seal during fermentation as the gases produced need to escape.
A rubber band or string — to secure the cloth cover over the jar.
A wooden spoon or clean stick — for stirring.
A kitchen scale — for measuring sugar accurately.
A fine mesh strainer — for straining the finished vinegar.
A dark glass bottle — for storing the finished vinegar. Amber or dark glass protects the live cultures from light damage.
That is everything. No specialist equipment, no starter culture, nothing to buy that you do not already have in a typical kitchen.

The Apple Cider Vinegar from Scraps Recipe

  • Apple scraps — peels and cores from roughly 6 to 8 apples
  • 1 litre of filtered or boiled and cooled water
  • 2 tablespoons of white sugar or raw cane sugar
  • If you do not have scraps from 6 to 8 apples all at once collect them over a week or two and keep them in the freezer until you have enough. Frozen scraps work just as well as fresh ones.

Step by Step Instructions

  1. Prepare your jar — Wash your jar thoroughly with hot water and soap. Rinse very well — any soap residue can inhibit fermentation. Do not sterilise with boiling water as you want to preserve the wild yeasts present in the environment.
  2. Dissolve the sugar — Dissolve 2 tablespoons of sugar in a small amount of warm water first, then add the remaining water at room temperature. This ensures the sugar is fully dissolved before adding the scraps.
  3. Add the scraps — Place your apple peels and cores into the jar. Pour the sugar water over the scraps until they are fully submerged. The scraps should be completely covered by at least 2 to 3 centimetres of liquid.
  4. Weigh down the scraps — Apple scraps float naturally and any pieces exposed to air above the liquid can grow mould. Use a small clean weight — a ziplock bag filled with water, a smaller jar filled with water, or a clean stone — to keep the scraps fully submerged.
  5. Cover and store — Cover the jar with muslin cloth or a clean tea towel and secure with a rubber band. Place in a warm dark spot — a kitchen cupboard, a shelf away from direct sunlight, or a warm corner of your kitchen. Ideal temperature is 18 to 24 degrees Celsius. In warmer climates fermentation happens faster.
  6. Stir daily for the first week — Once a day remove the cloth, stir the mixture with a clean spoon, and replace the cover. This introduces oxygen, distributes the wild yeasts evenly, and prevents mould forming on the surface. If you see white foam forming on the surface this is completely normal — it is wild yeast activity.
  7. Strain after 2 to 4 weeks — After two to four weeks the liquid should smell pleasantly alcoholic and slightly sweet — like rough apple wine. Taste a small amount. It should taste mildly alcoholic with apple flavour. Strain out all the apple scraps through a fine mesh strainer and discard or compost the solids. Pour the liquid back into the clean jar.
  8. Second fermentation — Cover the strained liquid with fresh muslin and return it to its warm dark spot. Leave undisturbed for another 4 to 8 weeks. During this time a mother will form on the surface — a slightly gelatinous disc that may look cloudy or slightly white. This is a very good sign. Taste the liquid every week or two. It will gradually become more sour as the alcohol converts to acetic acid.
  9. Bottle when ready — Your apple cider vinegar is ready when it tastes like vinegar — sharp, sour, with an underlying apple flavour. Bottle it in a dark glass bottle with the mother included. Store in a cool dark cupboard. It does not need refrigerating.

How to Know When Your Vinegar Is Ready

two glass jars showing apple cider vinegar fermentation stages from cloudy apple scrap liquid to clear golden finished vinegar with mother

TypThe taste test is the most reliable indicator. Your vinegar is ready when:

  • It tastes clearly sour and sharp — like vinegar not like wine
  • The sharp flavour has an underlying fruity apple note
  • A mother has formed on the surface
  • The liquid has clarified slightly and turned a golden amber colour
  • The alcoholic smell has been replaced by a sharp vinegary aroma

If it still tastes more like alcohol than vinegar leave it for another two weeks and taste again. Patience is the most important ingredient in this recipe.
The total time from scraps to finished vinegar is typically six to ten weeks depending on your kitchen temperature, the sugar content of your apple scraps, and how active the wild yeasts in your environment are.

How to Use Your Homemade Apple Cider Vinegar

dark glass bottle of homemade apple cider vinegar next to wooden salad bowl fresh greens olive oil and herbs on kitchen counter

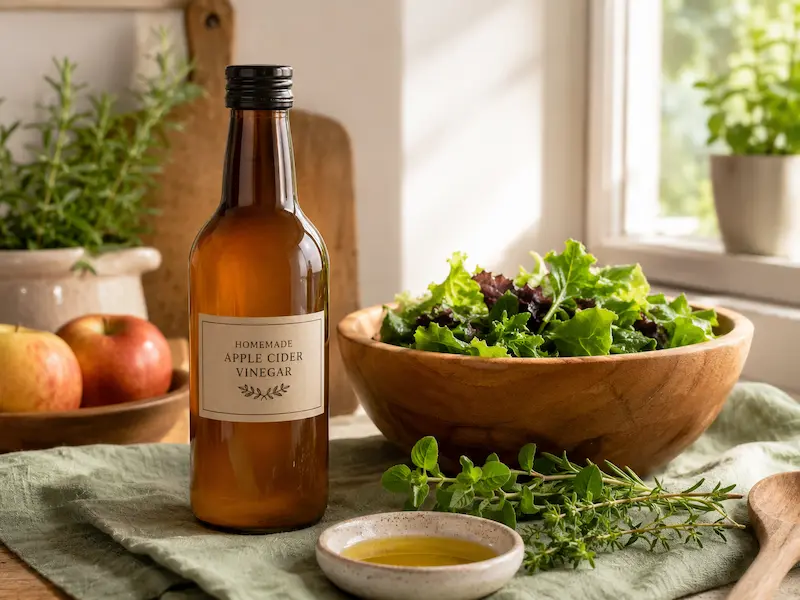
Your homemade apple cider vinegar can be used exactly like shop-bought raw apple cider vinegar in any recipe or application.

In cooking:

  • Salad dressings and vinaigrettes
  • Marinades for meat and vegetables
  • Pickling vegetables — cucumber, onion, beetroot
  • Added to soups and stews for brightness and acidity
  • Shrubs and drinking vinegars mixed with water and honey
  • Replacing lemon juice in recipes where a sharper acidity is welcome

Around the home:

  • Natural rinse for hair — diluted with water as a final rinse after washing
  • Cleaning surfaces — diluted with water as a gentle natural cleaner
  • Fabric softener alternative — a small amount in the rinse cycle
  • Removing mineral deposits from kettles and taps

What to Do With the Mother

The mother that forms in your apple cider vinegar is one of the most valuable parts of the batch. It is a living colony of acetobacter bacteria that you can use to:

  • Start your next batch of vinegar — add it to fresh apple scrap liquid to dramatically speed up the second fermentation
  • Start a batch of other fruit vinegars — pear, quince, or berry vinegar using the same method
  • Share with other home fermenters — the mother is infinitely renewable
  • Add it to purchased pasteurised vinegar to create a raw living version

Store the mother in a small jar covered with a little vinegar if you are not using it immediately. It will keep for months.

Troubleshooting Common Problems

White foam on the surface during week one

This is completely normal. It is wild yeast activity — the same process that makes bread rise and beer ferment. Stir it back in and continue as normal.

Fuzzy coloured mould on the surface

Pink, green, black, or blue fuzzy growth is mould and means something has gone wrong. Most commonly a piece of apple scrap was exposed to air above the liquid line. If the mould is only on the surface and has not penetrated the liquid you can carefully remove it with a clean spoon, ensure all scraps are submerged, and continue. If the mould smell has penetrated the whole batch discard it and start again.

No activity after two weeks

Your environment may be too cold or the wild yeast population in your kitchen may be low. Move the jar to a warmer spot and add a teaspoon of raw honey which contains abundant wild yeasts. If you have a sourdough starter a tablespoon added to the batch also introduces active wild yeasts and can kick-start a stalled fermentation.

Vinegar tastes very harsh and unpleasant

This usually means fermentation happened too fast in too warm a temperature producing an unbalanced acidity. Dilute with a small amount of water and leave for another two weeks — harsh young vinegar often mellows with time.

Very slow conversion from alcohol to vinegar

The second stage requires consistent oxygen exposure. Make sure your cloth cover is not too thick — it needs to allow airflow. Stirring once a week during the second stage also helps introduce oxygen and speed conversion.

Liquid has gone very dark

Normal — apple cider vinegar naturally darkens as it matures. A deep amber or brown colour is a sign of a well-developed vinegar with good flavour.

How to Store Homemade Apple Cider Vinegar

  • Store in a dark glass bottle in a cool dark cupboard
  • No refrigeration needed — the acidity preserves it naturally
  • Properly made apple cider vinegar lasts indefinitely
  • The mother may continue to grow in the bottle — this is normal and beneficial
  • If sediment forms at the bottom simply shake before using

Frequently Asked Questions

How is homemade apple cider vinegar different from shop-bought?

Raw homemade apple cider vinegar made from scraps is essentially identical to raw unfiltered apple cider vinegar sold in health food shops — it contains the mother, live cultures, and natural enzymes. Commercial pasteurised apple cider vinegar has been heat treated which destroys the mother and live cultures. Your homemade version is genuinely superior to the pasteurised supermarket variety.

Can I use other fruit scraps?

Yes. Pear scraps, quince scraps, and berry scraps all work using exactly the same method. The flavour of the finished vinegar will reflect the fruit used. Apple is the most reliable starting point because of the high wild yeast content on apple skins but other fruits work well once you are comfortable with the process.

Is it safe to eat?

Yes. The high acidity of properly made vinegar creates an environment where harmful bacteria cannot survive. If your vinegar smells and tastes like vinegar it is safe. Trust your senses — bad vinegar is immediately obvious from the smell alone.

Can I speed up the process?

Yes. Adding a tablespoon of raw unpasteurised apple cider vinegar with the mother to your initial batch introduces active acetobacter and can cut the second fermentation time significantly. Adding the mother from a previous batch is even more effective.

Does it need to be kept warm?

Warmer temperatures ferment faster — 22 to 26 degrees Celsius is ideal. In cold climates or during winter the process simply takes longer. In very hot climates above 30 degrees fermentation can happen quite quickly — check and taste more frequently.

What if I do not have enough scraps at once?

Collect scraps in the freezer over one to two weeks until you have enough. Frozen scraps work exactly as well as fresh and the freezing process actually breaks down cell walls slightly which can help release sugars and wild yeasts more effectively.

Final Thoughts

Making apple cider vinegar from scraps is one of the most satisfying zero waste projects you can do in a small apartment kitchen.

You take something that would otherwise go in the bin — apple peels, apple cores, the parts most people throw away without a second thought — and you turn them into something genuinely useful and genuinely alive.

A bottle of raw apple cider vinegar with the mother sitting in your kitchen cupboard, made from your own kitchen scraps, is a small but meaningful symbol of what apartment homesteading is really about. Nothing wasted. Everything used.

The process takes patience but almost no effort. A few minutes of preparation, a daily stir for a week, then weeks of quiet fermentation while you get on with everything else.

Start your first batch this week. By the time you have forgotten you started it you will have a jar of living vinegar ready to bottle.

Found this guide helpful? Save it to your Apartment Homesteading Pinterest board so you can find it later.

Already composting your kitchen scraps? Read our guide on Apartment Worm Composting to discover how to turn your remaining kitchen waste into free plant fertilizer — the perfect companion project to your apple cider vinegar batch.

Leave a Reply

Your email address will not be published. Required fields are marked *