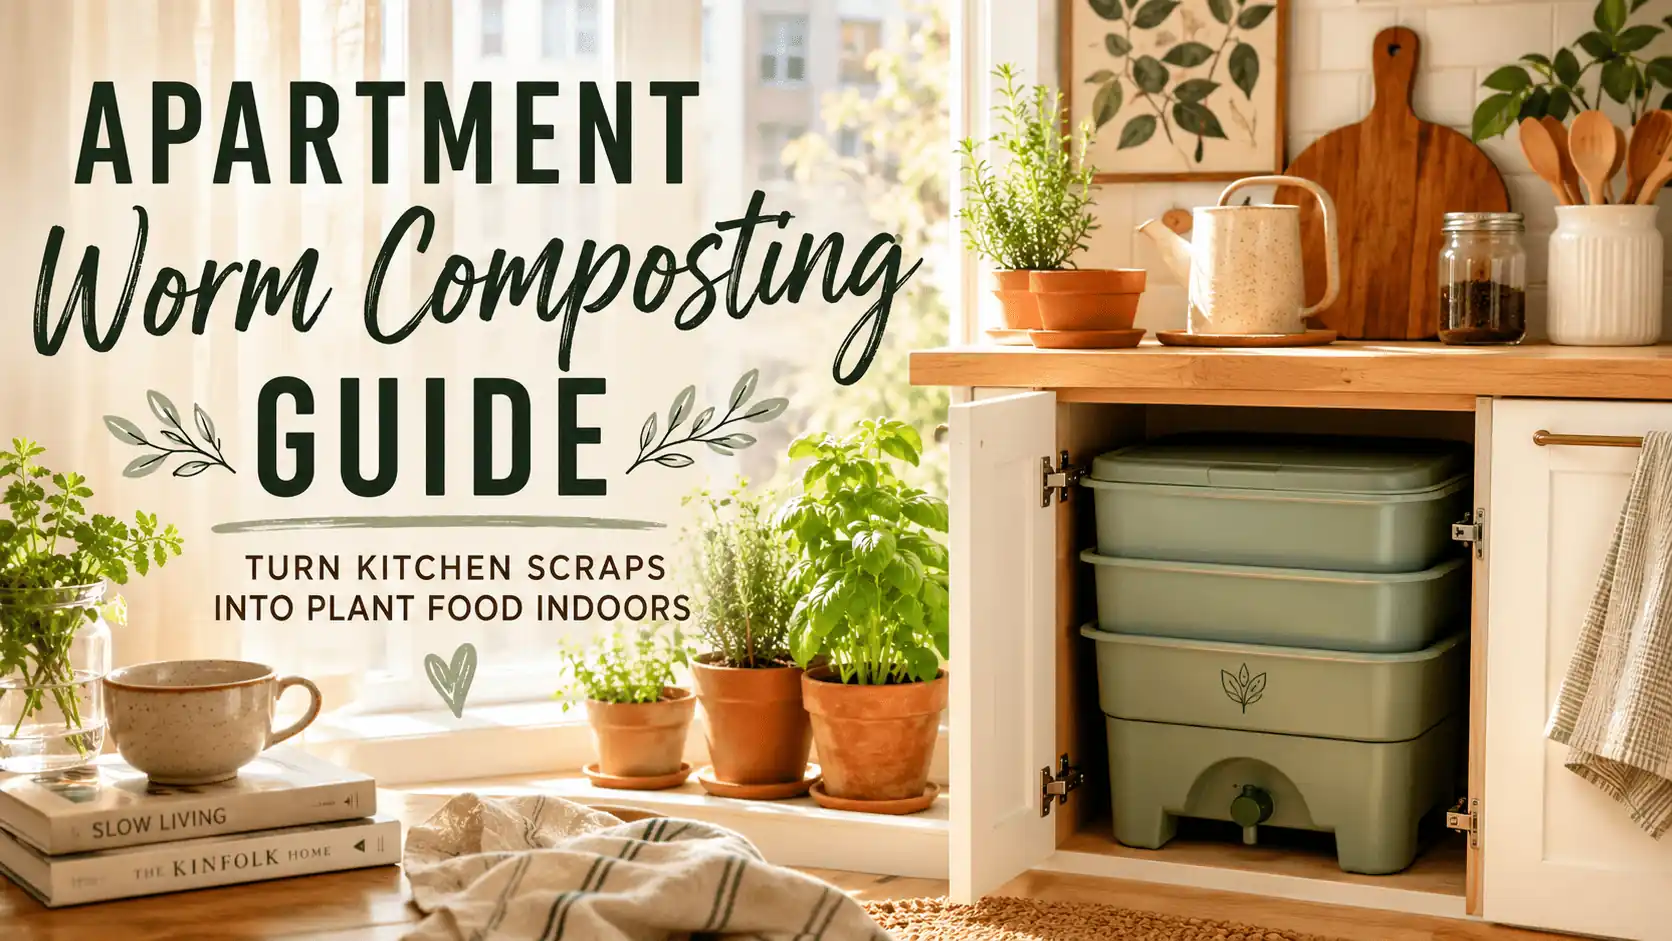
Apartment Worm Composting: The Complete Beginner’s Guide for Small Spaces
Apartment Worm Composting Guide: How to Turn Kitchen Scraps Into Plant Food Indoors
I used to throw away over half my kitchen scraps every week.
Now almost nothing goes in the trash — and my herbs have never grown better.
Apartment worm composting was the last thing I expected to be doing as a renter.
Like many people, I assumed keeping worms indoors would be messy,
smelly, and far too complicated for a small apartment. I was wrong.
A properly maintained worm bin is surprisingly clean, takes up very little space, and
turns everyday kitchen scraps into one of the best natural fertilizers available.
If you're trying to reduce food waste, grow healthier plants, or embrace apartment homesteading,
apartment worm composting is one of the most rewarding projects you can start.
Unlike traditional compost piles, vermicomposting works entirely indoors. You don't need a backyard, garage, or large balcony.
All you need is a small worm bin, a handful of red wiggler worms, and a little patience.
In this guide, you'll learn:
What Is Apartment Worm Composting?
Apartment worm composting, also called vermicomposting, uses composting worms to break down food scraps and
organic materials into a nutrient-rich fertilizer known as worm castings.
The worms consume food waste and bedding, then convert everything into dark,
crumbly compost packed with beneficial microbes, minerals, and plant-available nutrients.
Everything happens inside a compact indoor bin, making it ideal for:
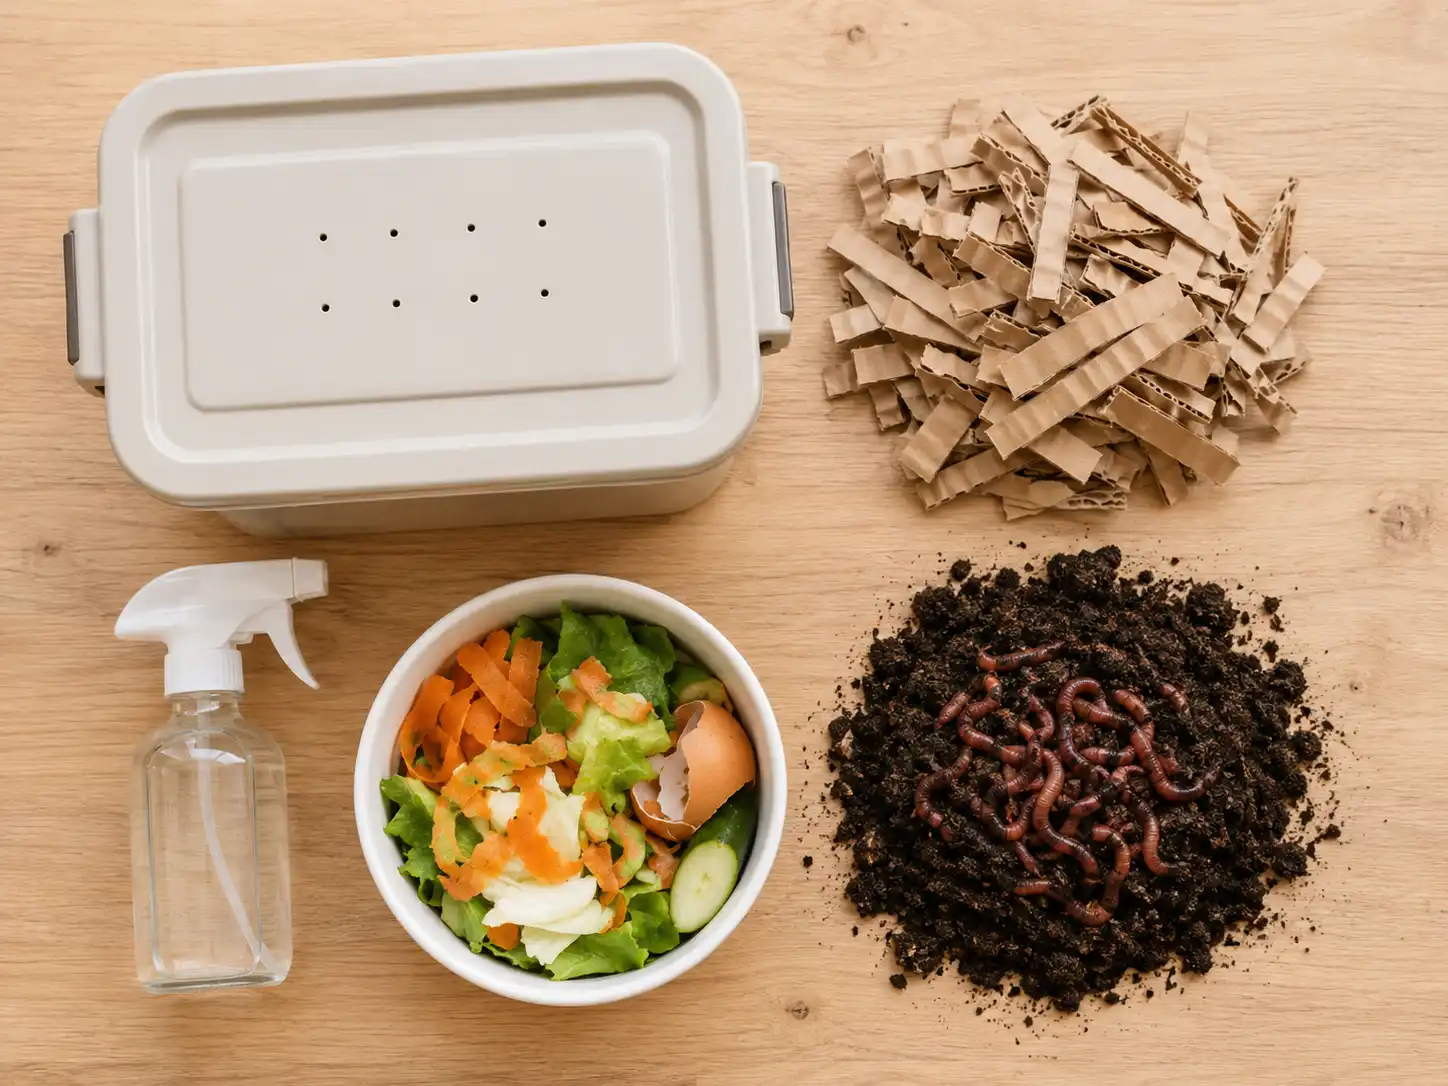
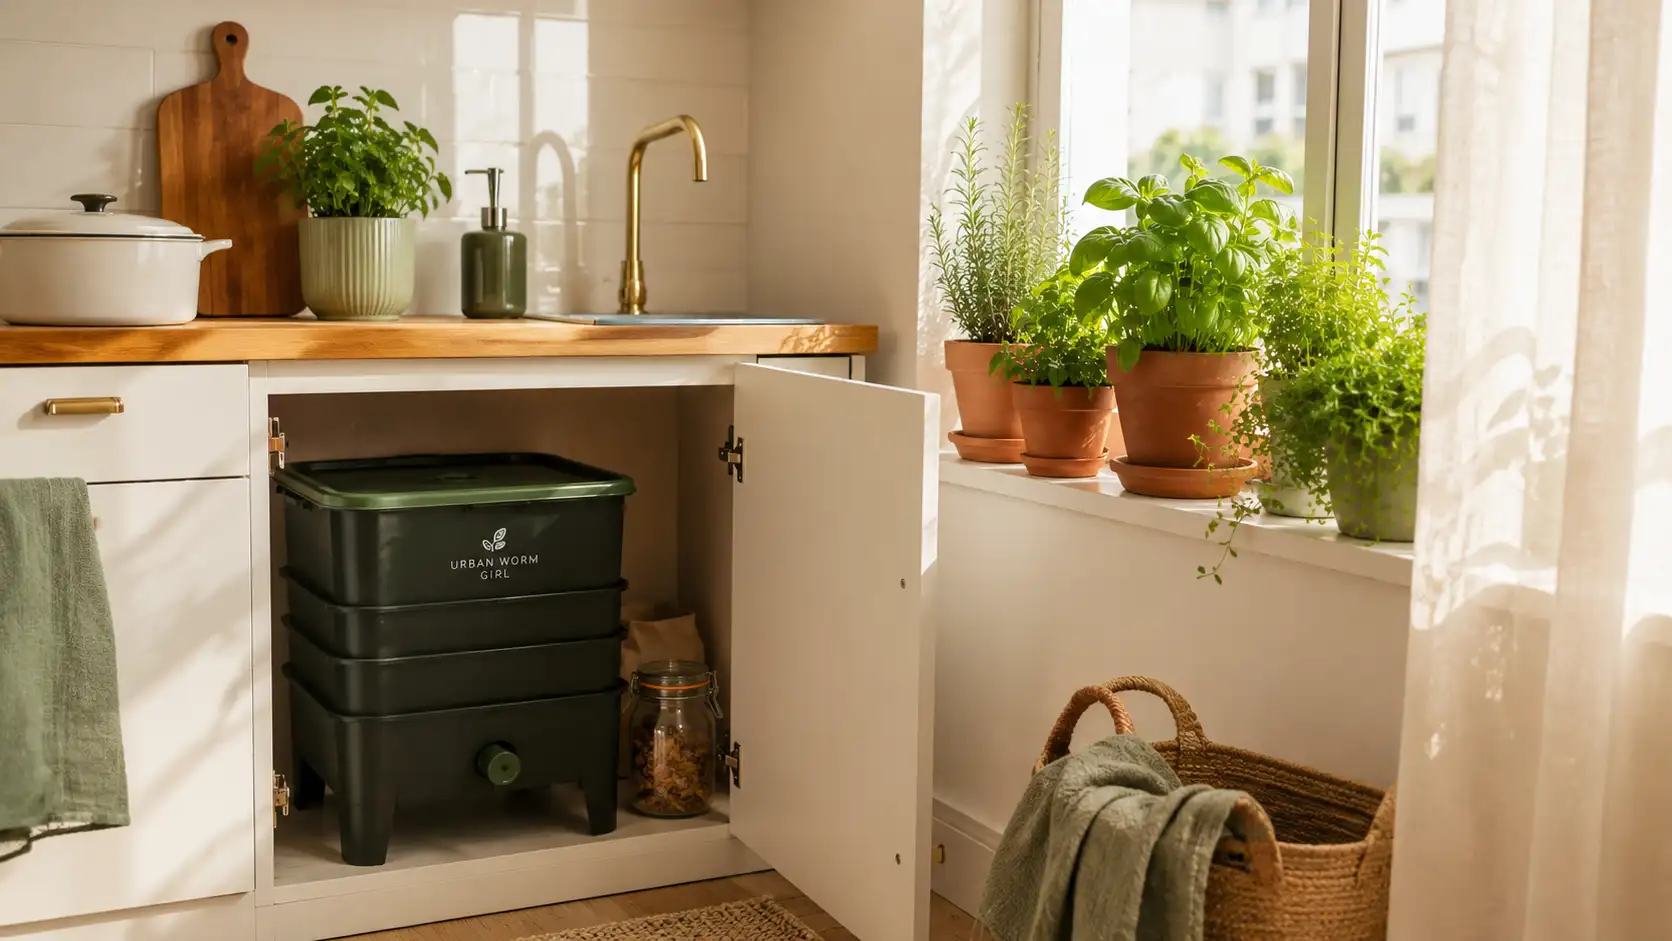
What You Need to Start Apartment Worm Composting
A Worm Composting Bin
A stackable worm bin works best for apartments. These systems use multiple trays that stack on top of each other.
As worms finish one tray they migrate upward into the next, making harvesting much easier than single-bin systems.
Look for a bin that offers good airflow, a drainage tray, a compact footprint, and easy access for feeding and harvesting.
A 10–20 litre system is enough for most households.
Red Wiggler Worms
Red wigglers are the only worms worth using for indoor composting.
One pound (around 450g) is the right starting amount for most beginners.
Bedding Material
Good bedding options include:
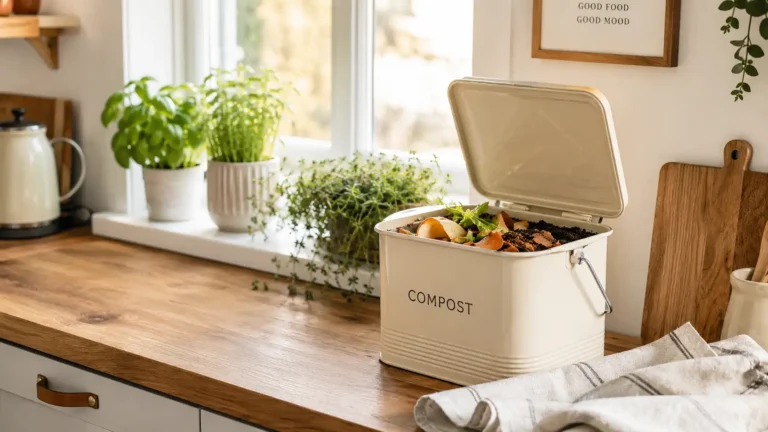
A Kitchen Scrap Container
A small countertop container with a lid lets you collect scraps throughout the day.
Empty it into the worm bin every two to three days.
A Spray Bottle
Used to keep bedding at the right moisture level. That's genuinely everything you need to get started.
Why Red Wigglers Are the Best Worms for Indoor Composting
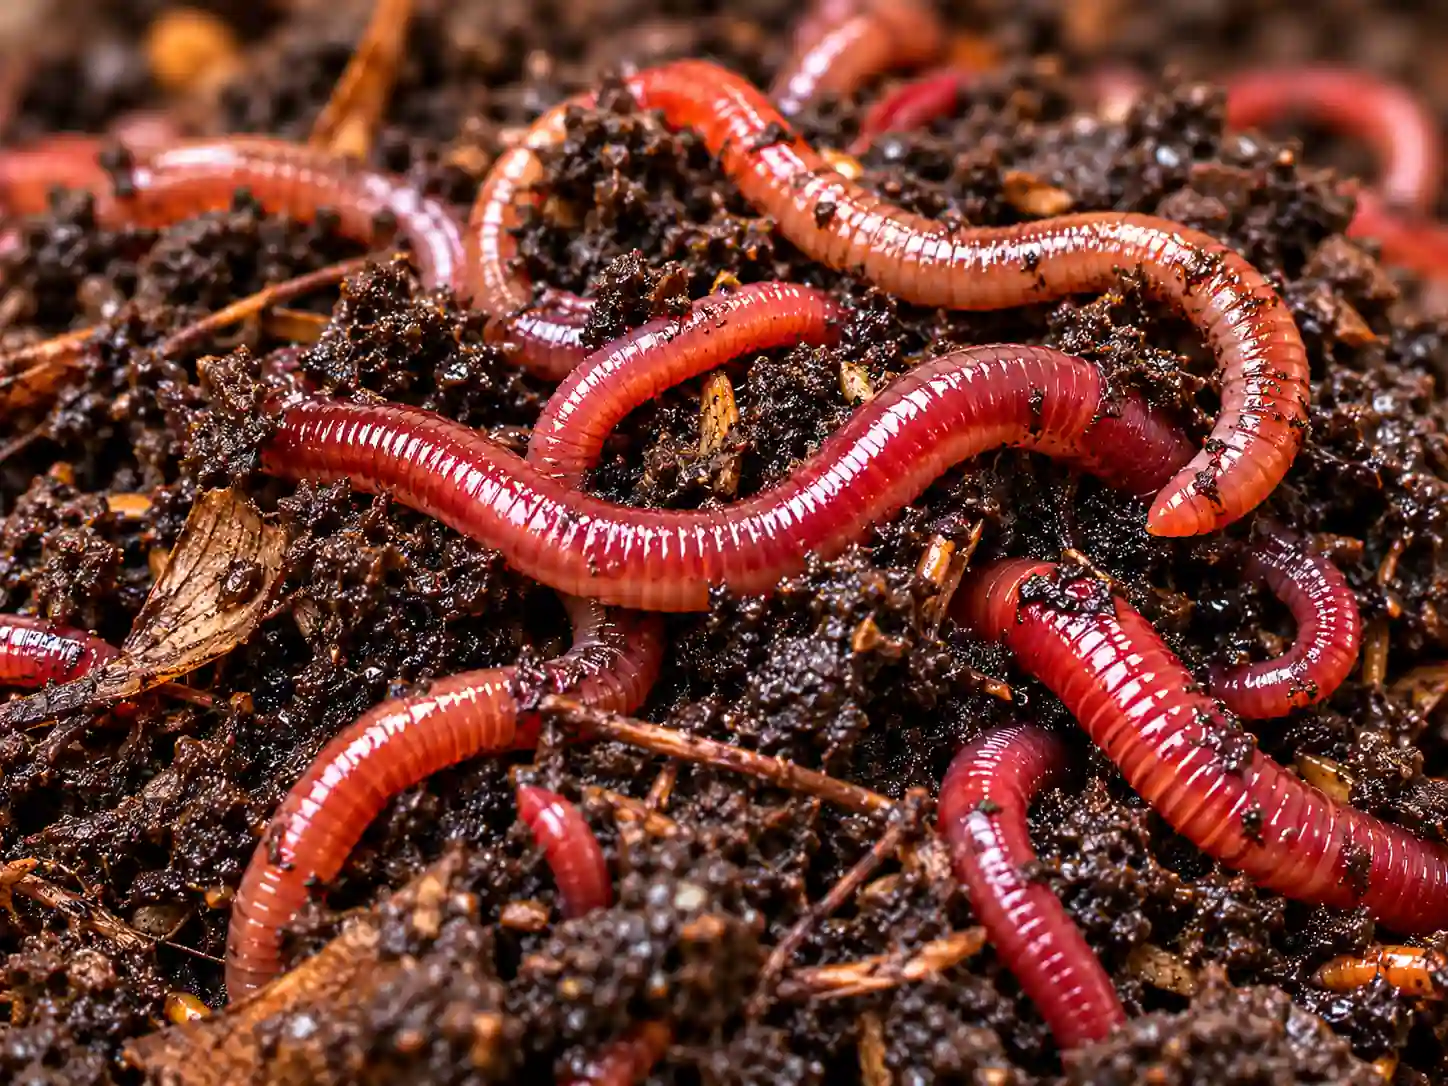
Not all worms are suitable for vermicomposting — using the wrong type is one of the most common beginner mistakes.
Red wigglers (Eisenia fetida) are surface-dwelling worms that naturally live in decaying organic matter —
fallen leaves, rotting logs, compost heaps. They're perfectly adapted to the shallow, food-rich environment of a worm bin.
Here's why they work so well:
How to Set Up Your First Worm Bin
Setting up your bin correctly from the beginning makes everything easier going forward.
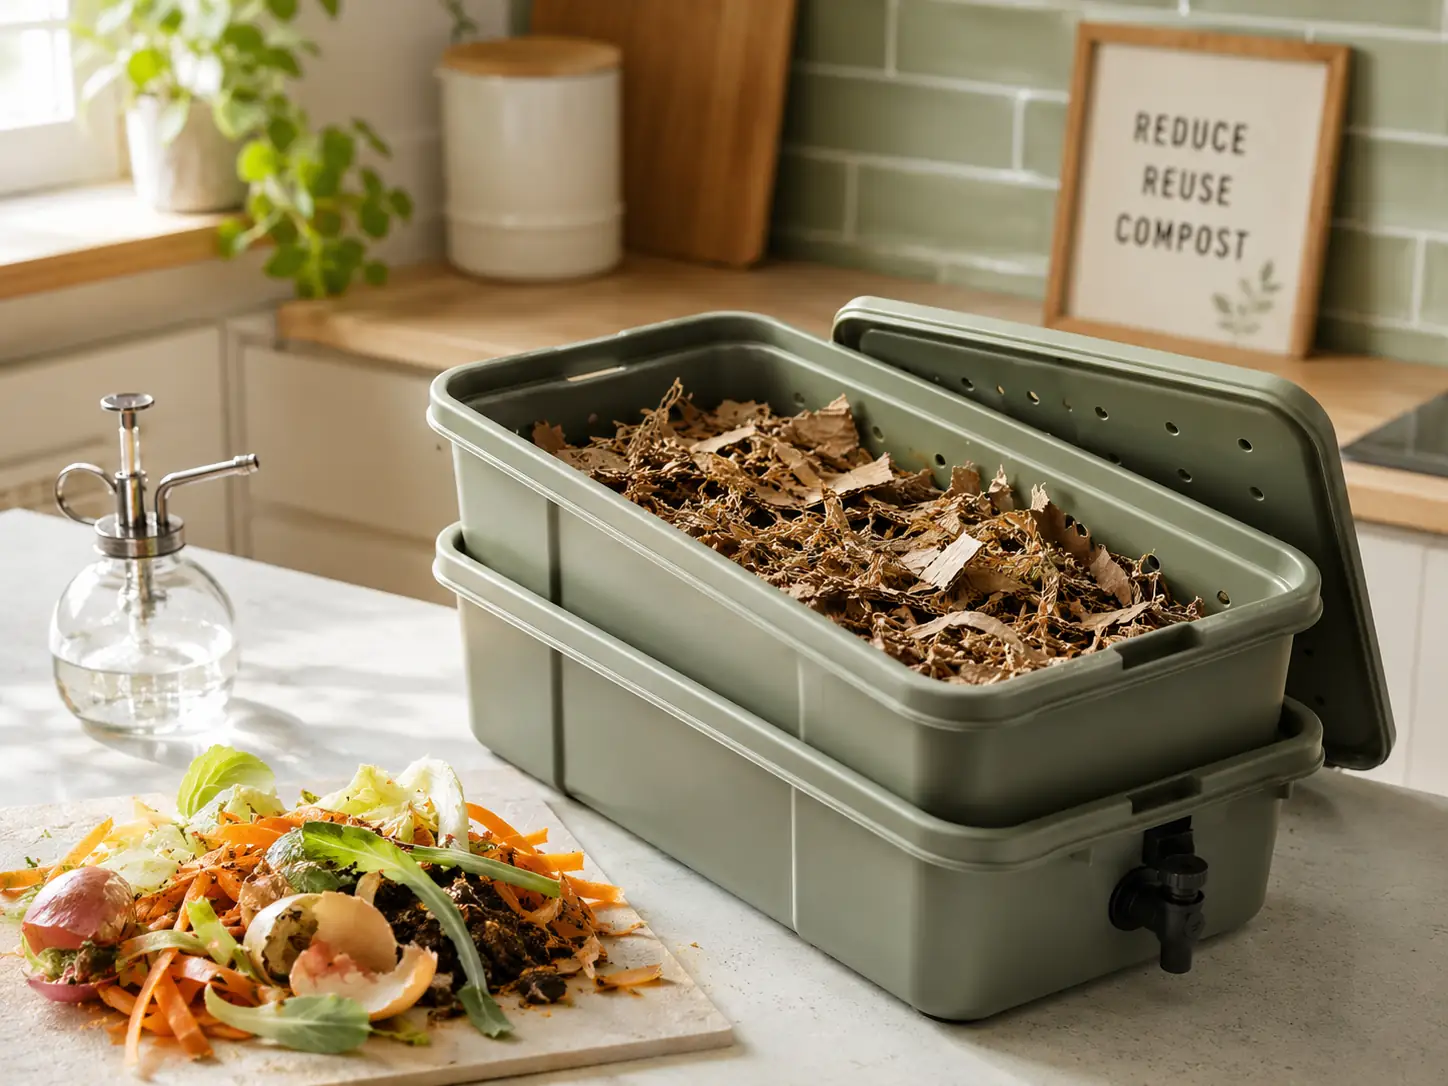
Step 1 — Prepare the Bedding
Shred cardboard or newspaper into strips. Place a thick layer into the bottom tray — around 10–15cm deep.
Dampen it until it feels like a wrung-out sponge — moist throughout but not dripping.
This moisture level matters. Too dry and the worms will struggle. Too wet and the bin becomes smelly.
Step 2 — Add the Worms
Tip your red wigglers onto the surface of the bedding.
They'll naturally burrow downward away from the light.
Leave the lid off for the first 30 minutes to encourage them to settle deeper rather than escape over the edges.
Step 3 — Add a Small First Feeding
Start with just a handful of food scraps. Bury it beneath the bedding rather than leaving it on the surface.
Overfeeding in the first few weeks is the single most common beginner mistake and the main cause of smelly bins.
Step 4 — Cover the Food
Always bury food scraps under a layer of bedding.
This prevents fruit flies from finding the food and significantly reduces odours.
A handful of dry shredded cardboard on top of every feeding works perfectly.
Step 5 — Monitor Moisture Regularly
Check the bin every couple of days in the first few weeks. If bedding is drying out, mist with a spray bottle.
If it's getting too wet, add more dry shredded cardboard. Once you find the right rhythm —
usually within two to three weeks — maintenance becomes second nature.
What Can Worms Eat?
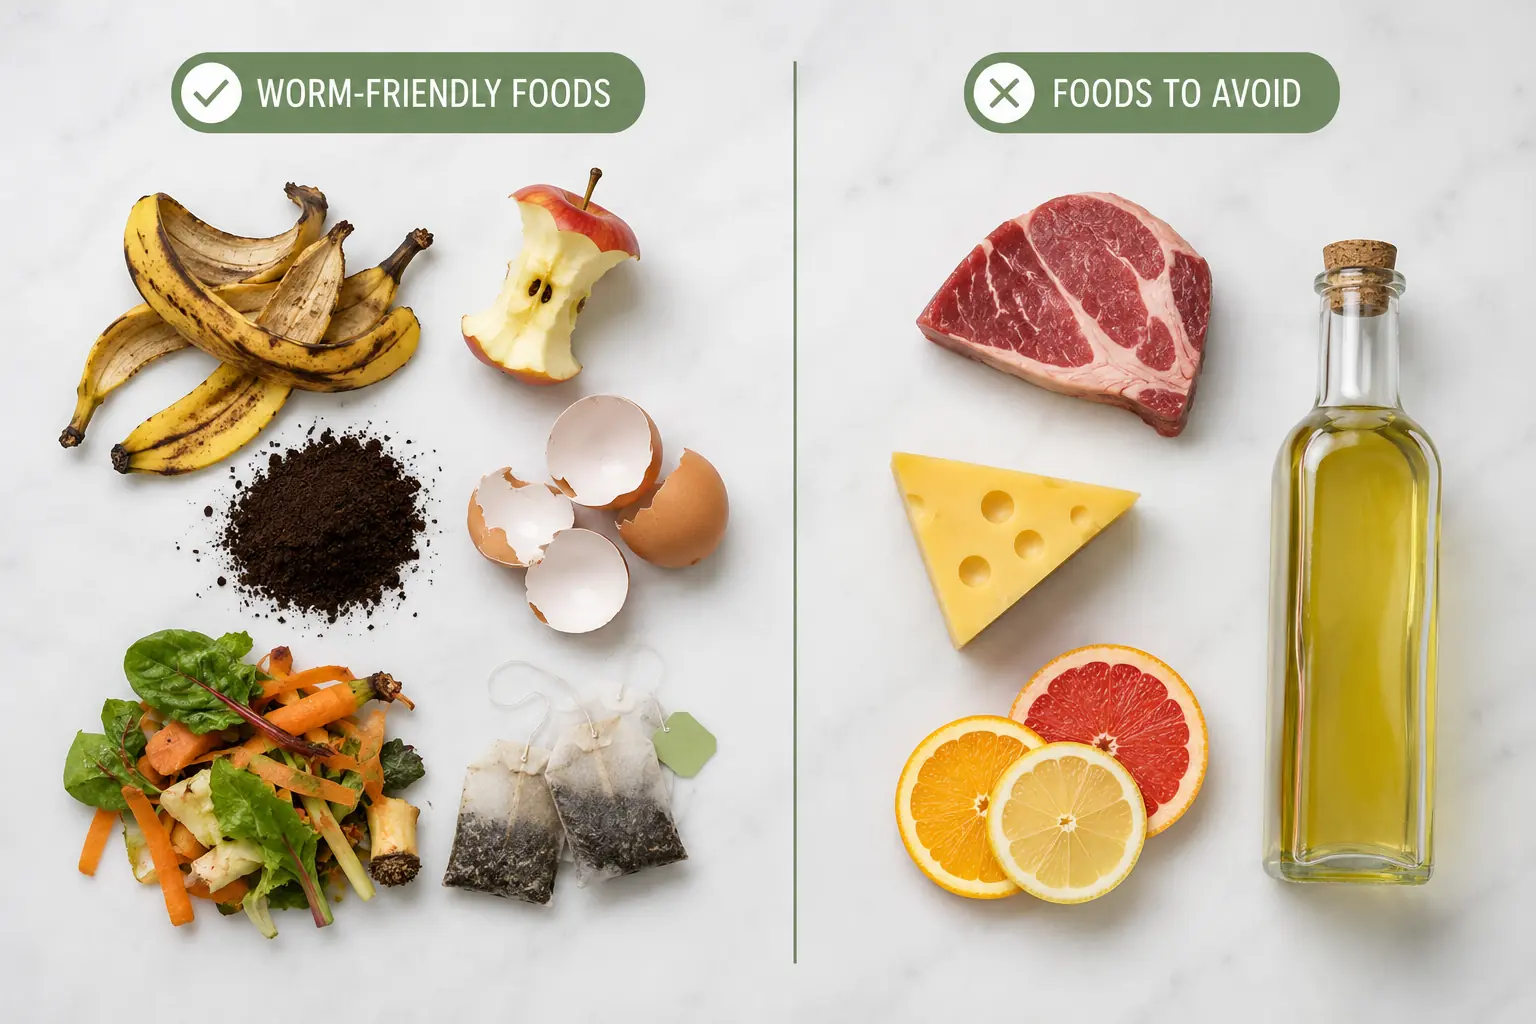
Feeding your worms correctly is essential for a healthy, odour-free bin.
Foods Worms Love
Common Worm Composting Problems and How to Fix Them
Every beginner runs into at least one issue. Here's how to solve the most common problems quickly.
Problem: Bad Smell
A healthy worm bin should smell earthy — like fresh soil after rain. If yours smells rotten, something needs attention.
Causes: Too much food, bin too wet, poor airflow.
Fix: Stop feeding for one week. Add dry shredded cardboard. Mix the bedding gently to improve airflow. The smell should clear within a few days.
Problem: Fruit Flies
Fruit flies appear when food scraps are left exposed on the surface.
Fix: Always bury food under bedding. For an existing infestation, freeze scraps for 24 hours before adding them — this kills any eggs already in the food. A dry cardboard layer on top of every feeding acts as a permanent barrier going forward.
Problem: Worms Trying to Escape
Worms stay put when conditions are comfortable. If they're leaving, the environment is off.
Causes: Bin too wet, too acidic, or wrong temperature.
Fix: Check moisture levels. Reduce acidic foods. Add crushed eggshells to balance pH. Move the bin to a more stable location.
Problem: Bin Too Wet
A soggy bin slows composting and can become smelly.
Fix: Add several handfuls of dry cardboard and leave the lid slightly open for a day. Going forward, add dry cardboard with every feeding to absorb liquid from fresh scraps.
Problem: Worms Not Eating
Scraps sitting uneaten for more than a week means the worms need more time to settle or the food is too hard or dry.
Fix: Chop or blend scraps into smaller pieces. Check bedding moisture. Be patient — new worm populations often take two to four weeks to reach full productivity.
How to Harvest Worm Castings
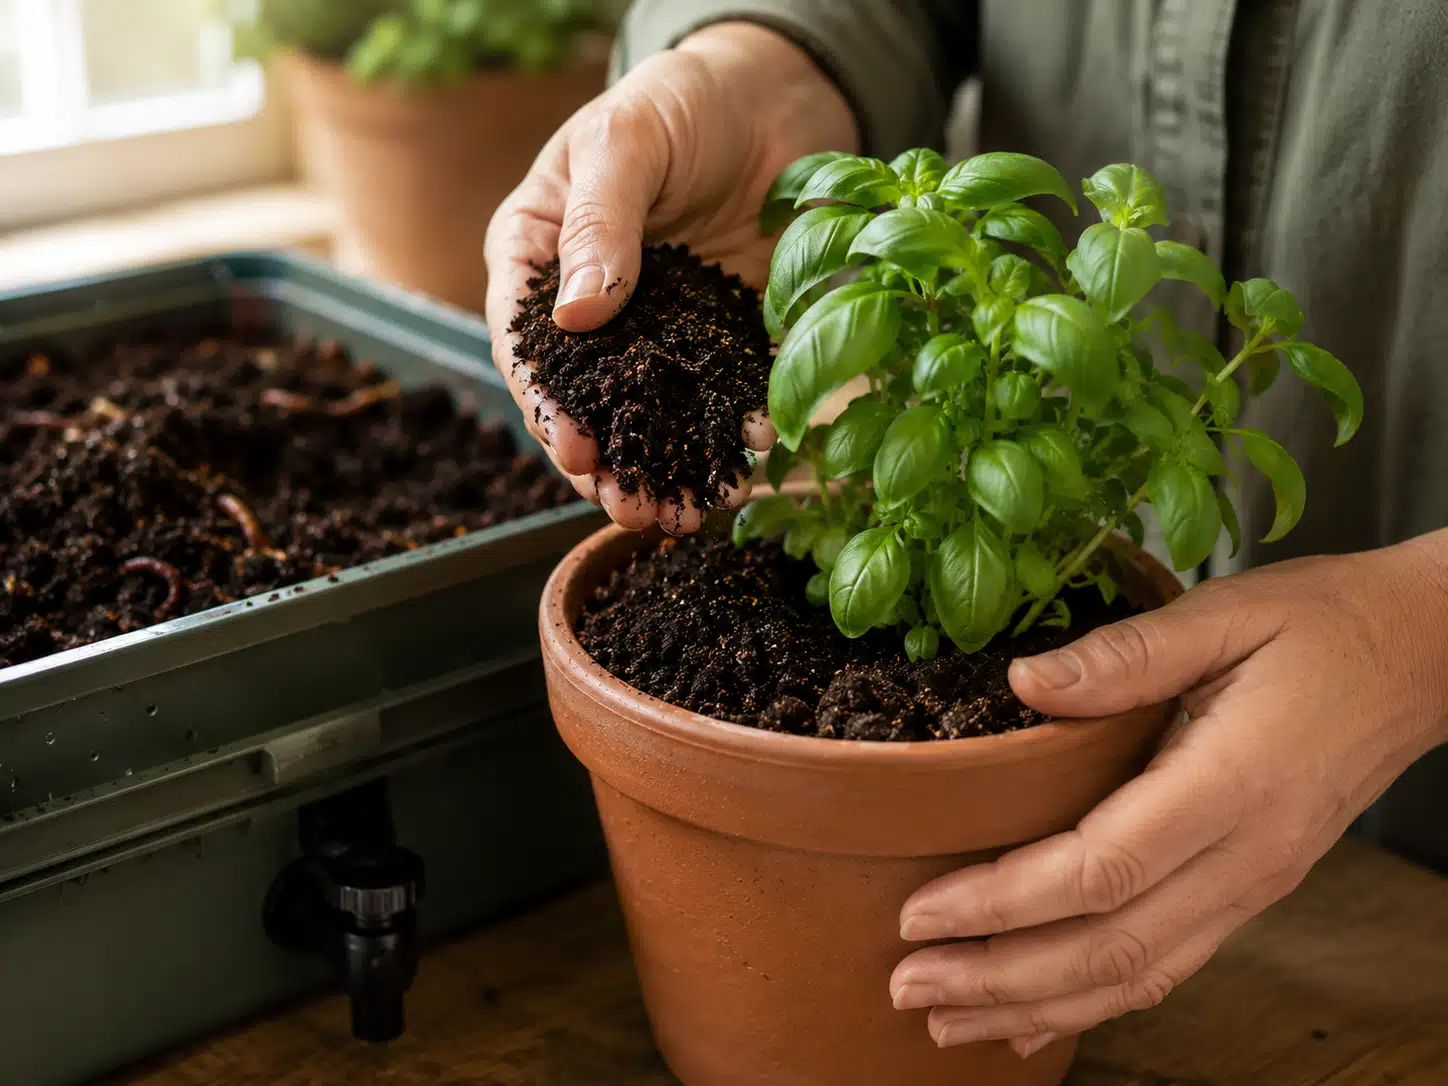
Harvesting is the most satisfying part of vermicomposting.
After two to four months your bin will contain dark, crumbly, nutrient-rich castings ready for your plants.
Worm Composting vs Other Apartment Composting Methods
Not sure whether vermicomposting is right for your apartment?
Here's how it compares to the other main indoor composting options: