A dense flat sourdough loaf next to a perfectly risen sourdough loaf on a rustic wooden kitchen counter with a sourdough starter jar in the background in warm morning light

Why Is My Sourdough Dense? 10 Problems Solved for Beginners

A dense flat sourdough loaf next to a perfectly risen sourdough loaf on a rustic wooden kitchen counter with a sourdough starter jar in the background in warm morning light

If you are asking why is my sourdough dense or why it keeps coming out flat and heavy every single time — this guide is for you.

Here is the thing nobody tells you when you first get into sourdough. The process is not actually complicated. Flour, water, wild yeast, time. That is genuinely all it is. But because sourdough is alive — because it breathes, ferments, and responds to its environment in ways that a packet of commercial yeast never will — it can behave in ways that feel completely unpredictable when you are just starting out.
One week your loaf rises beautifully. The next it comes out like a brick. You followed the same recipe. You did the same steps. And yet something went wrong somewhere.
The good news is that sourdough problems are almost never random. Every single issue on this list has a clear cause and a straightforward fix. You do not need expensive equipment, specialist ingredients, or years of experience to get this right. You just need to know what to look for.
Let us go through the ten most common problems beginners face — and exactly what to do about each one.

Before We Troubleshoot — Is Your Starter Actually Ready?

A glass sourdough starter jar on a kitchen counter showing active bubbling starter with visible rise and bubbles throughout in warm natural morning light

Before we get into specific problems there is one question that sits above all of them — and it is the one most beginners skip straight past
Is your starter actually ready to bake with?
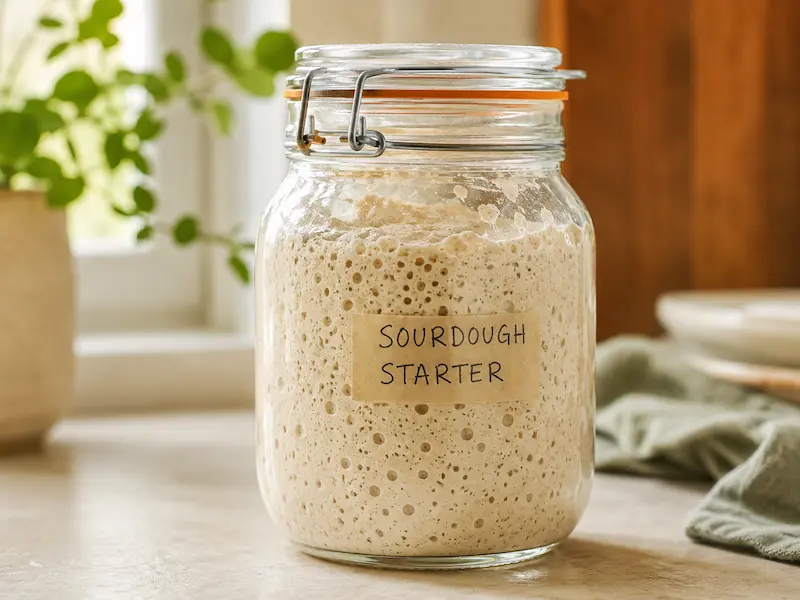
This is not a trivial question. The single most common reason sourdough fails for beginners — the dense loaf, the flat loaf, the loaf that simply refuses to rise — is not bad technique. It is a starter that was not active enough when it went into the dough.
A starter that looks bubbly and alive is not necessarily ready. It needs to be reliably, predictably active before you can expect it to leaven a loaf of bread. Here is what ready actually looks like:

  • It reliably doubles in size within 4 to 8 hours of feeding — not just once, but consistently, day after day
  • It is full of bubbles — throughout the jar, not just on the surface. A bubbly surface with a flat interior is not ready.
  • It smells pleasantly sour — tangy and yeasty with a hint of yoghurt. Not acetone, not nail polish remover, not alcohol.
  • It passes the float test — drop a small spoonful into a glass of water. If it floats, the wild yeast has produced enough gas and it is ready. If it sinks, give it more time and another feed.

If your starter is not doing all of the above consistently and predictably, no amount of perfect technique will save your loaf. A weak starter produces weak bread. Every single time.
Fix the starter first. Bake second.

The 10 Most Common Sourdough Problems — And How to Fix Them

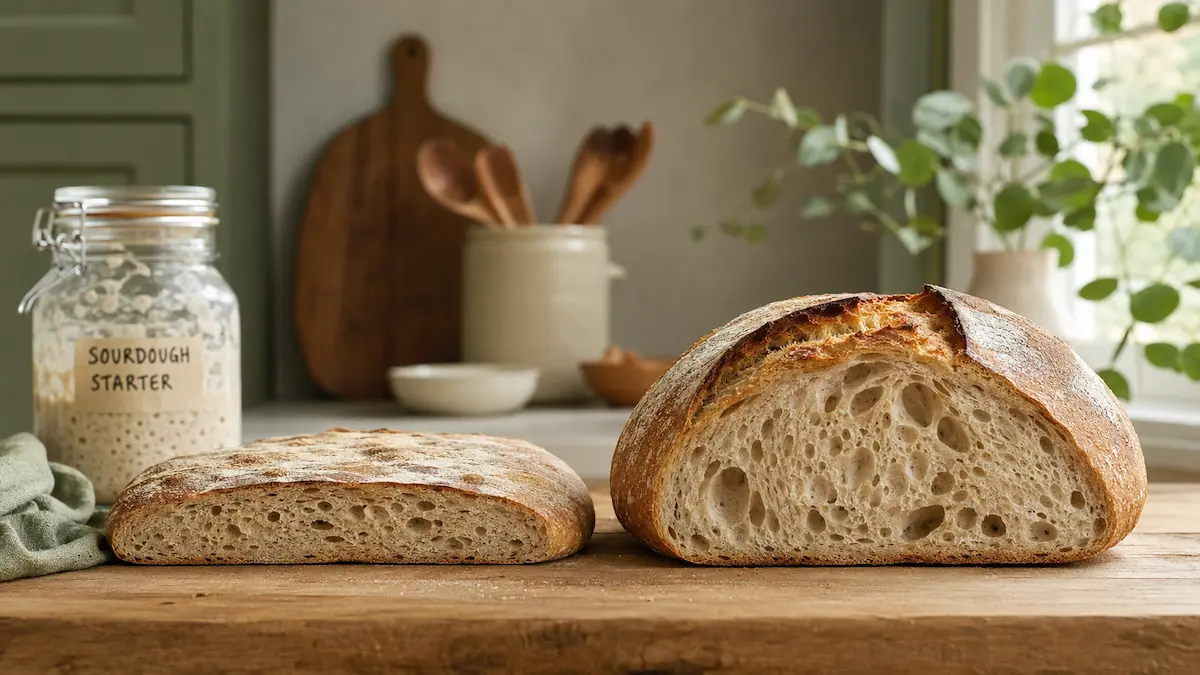
Problem 1 — My Sourdough Is Dense and Heavy

This is the question that brings most people to this page — and it is the most common sourdough problem for a reason. Dense bread is discouraging. You put in hours of work and pulled out something that looks and feels like a doorstop. It happens to almost every beginner and it is completely fixable.

Dense sourdough almost always traces back to one of three root causes:

  • Starter used too early or too late — using your starter before it reaches peak activity means the wild yeast population is not large enough to produce the gas needed for a good rise. Using it after peak — when it has already started to fall — means the yeast is exhausted. The window you are aiming for is when the starter has doubled, is still domed on top, and jiggles when you shake the jar.
  • Bulk fermentation cut short — this is the long first rise after you mix your dough and it is where most of the flavour and structure develops. In a cool kitchen at 18–20°C / 64–68°F this takes 8 to 12 hours. Many beginners cut it to 4 or 5 and wonder why the bread is dense. The dough should look noticeably puffier, feel lighter, and have bubbles visible on the surface and sides before you move on to shaping.
  • Wrong flour — all-purpose flour does not have enough protein to build the gluten network sourdough needs. Switch to strong bread flour with at least 12% protein and the difference is immediately noticeable.

The fix: Use your starter at peak activity, give your bulk fermentation the full time it needs regardless of what the recipe says, and use strong bread flour.

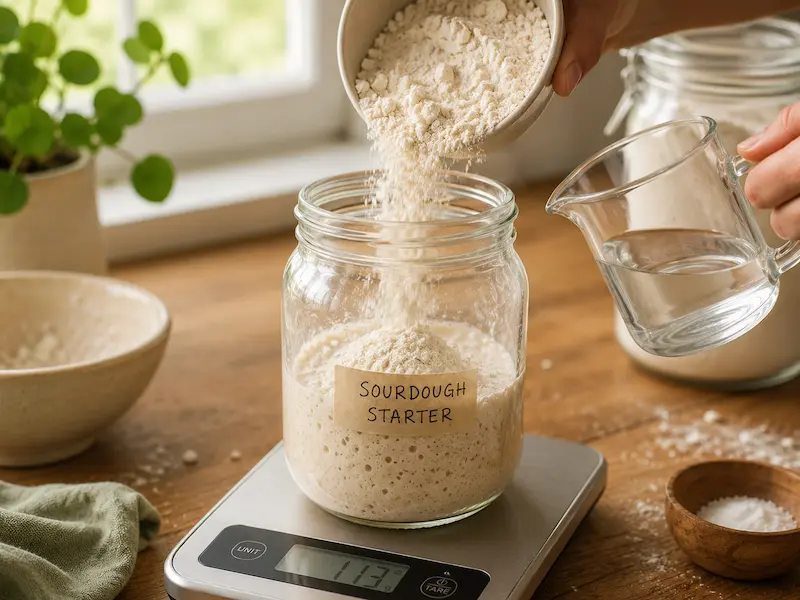
Problem 2 — My Sourdough Starter Is Not Rising

Two sourdough starter jars side by side on a kitchen counter with rubber bands marking the starting level showing one flat inactive starter on the left and one doubled bubbly active starter on the right

A starter that sits completely flat after feeding — no rise, no bubbles, no sign of life — is one of the most disheartening things to wake up to. But before you consider throwing it out, understand that this is almost always an environmental problem rather than a dead starter.

  • It is too young — if your starter is less than two weeks old it may simply not have developed a large enough population of wild yeast yet. The microorganisms that make sourdough work need time to establish themselves. Keep feeding daily and give it at least 14 days before making any judgements about its health.
  • It is too cold — this is the most common cause of a flat starter by far. Wild yeast becomes dramatically less active below 18°C / 64°F and essentially goes dormant below 10°C / 50°F. A starter sitting on a cold kitchen counter in winter may show almost no activity at all. Move it somewhere genuinely warm — on top of the fridge, inside an oven with just the light on, or near (not on) a radiator.
  • The feeding ratio is off — if you are adding too much flour and water relative to the amount of starter you are keeping, you are diluting the yeast population too aggressively at each feed. Try a 1:1:1 ratio by weight — one part starter, one part flour, one part water — until it becomes reliably active.
  • Wrong flour type — wholemeal or rye flour contains more wild yeast and bacteria than white flour and can help kickstart a sluggish starter. Try replacing 20% of your white flour with wholemeal rye for a few feeds and see if activity increases.

The fix: Find a consistently warm spot at 24–26°C / 75–79°F, feed at the same time every day, and add a small amount of rye flour to your feed if activity remains low after a week.

Problem 3 — My Sourdough Is Too Sour

Not everyone wants the sharpest, most aggressively sour sourdough. If your bread is coming out tasting more like vinegar than bread there are specific reasons for it and specific ways to pull the flavour back toward a milder, more balanced tang.

  • Over-fermented dough — the longer dough ferments the more acid builds up. If your kitchen is warm — above 24°C / 75°F — bulk fermentation can complete in as little as 4 to 5 hours. Leaving it for 10 hours in a warm kitchen will produce very sour bread. Learn to read the dough rather than the clock.
  • Cold retard too long — proofing your shaped dough overnight in the fridge (cold retarding) is a technique that develops flavour beautifully — but the longer the dough stays cold the more acetic acid builds up. If your bread is very sour, try reducing your cold retard from 12 hours to 8 hours and taste the difference.
  • Starter used past peak — a starter that has already risen and started to fall produces more acidic bread than one used at peak. The fallen starter has had more time to produce acid. Use it on the rise or right at the top.
  • High hydration dough — wetter doughs tend to produce more lactic acid (yoghurt-like tang) while stiffer doughs produce more acetic acid (sharp vinegar tang). If you want a milder flavour try slightly reducing your water percentage.

The fix: Shorten your bulk fermentation, reduce your cold retard time, and use your starter at peak activity rather than after it has started to fall.

Problem 4 — My Sourdough Is Gummy Inside

You waited the full bake time. You let it cool — well, mostly. You cut into it expecting a beautiful open crumb and found something that looks underdone and sticks to the knife. This is one of the most common beginner frustrations and it is almost entirely avoidable.

  • Cut too soon — this is the most common cause and the hardest rule to follow when you have a beautiful hot loaf sitting on your counter. The interior of sourdough continues to cook and set as steam dissipates during cooling. Cutting into it within the first hour — sometimes even within the first two hours — traps that steam inside and creates a gummy, undercooked-looking crumb even when the bread is technically baked through. The minimum wait is one hour. Two hours is better. For a large loaf, longer still.
  • Underbaked — your oven thermometer and your recipe's suggested time are not always reliable guides. The most accurate way to know your sourdough is done is internal temperature — it should reach 96–98°C / 205–210°F. Without a thermometer, tap the bottom of the loaf firmly. It should sound distinctly hollow. If it sounds dense and muffled, return it to the oven for another 10 minutes.
  • Too high hydration — doughs with very high water content above 75% are inherently more prone to a gummy crumb, especially for beginners who are still learning to read fermentation. Start at 68 to 72% hydration and work up gradually as your skill develops.

The fix: Wait at least two hours before cutting, check doneness with a thermometer, and reduce hydration to 68–72% if gumminess persists.

Problem 5 — My Sourdough Is Not Rising in the Oven

A well risen scored sourdough loaf with a deep ear and good oven spring inside a Dutch oven with the lid removed in a home oven in warm golden light

Oven spring — that dramatic burst of rise in the first 15 to 20 minutes of baking — is one of the most satisfying moments in sourdough. When it does not happen, and the loaf sits flat and heavy in the oven, something in the environment is not right.

  • Oven temperature too low — sourdough needs intense heat to spring properly. Most home ovens need to be set to 230–250°C / 450–480°F and allowed to preheat for a full 45 minutes — not just until the oven beeps that it has reached temperature, because the internal walls and the baking vessel take much longer to fully heat up than the air inside.
  • No steam environment — the crust needs to stay soft and elastic for the first 20 minutes of baking so the loaf can expand freely. Without steam the crust sets too quickly and traps the loaf in its current shape. A preheated Dutch oven with the lid on creates a perfect steam environment in any home oven. This single piece of equipment makes more difference than almost anything else in beginner sourdough.
  • Dough over-proofed before baking — if the shaped dough sat in the fridge too long or proofed at room temperature for too long before going into the oven, the gluten structure has weakened and the gas produced by fermentation has already mostly escaped. The dough has nothing left to give in the oven. The poke test tells you where you are — press the dough gently with a floured finger. Slow spring-back means it is ready. No spring-back at all means it is over-proofed.

The fix: Preheat your oven and Dutch oven for a full 45 minutes, bake your loaf straight from the fridge into the screaming hot Dutch oven with the lid on for the first 20 minutes.

Problem 6 — My Sourdough Crust Is Too Hard

A crackling crust is one of the glories of a well-made sourdough. A crust so hard it chips teeth and shatters when you try to cut it is something else entirely. The difference usually comes down to what happens in the last phase of baking and immediately after.

  • Too long uncovered in the oven — once the Dutch oven lid comes off in the second phase of baking the crust dries and hardens quickly. If you are baking 20 minutes with the lid on followed by 25 minutes uncovered and the crust is coming out too hard, try reducing the uncovered time to 18 or 20 minutes. Every oven runs differently.
  • Cooled in a draft or cold spot — putting a hot sourdough loaf directly onto a cold surface or in a drafty spot causes the crust to contract and harden more aggressively than it would in a still, warm environment. Rest the loaf on a wire rack in a still corner of your kitchen, away from open windows and cold countertops.
  • Overbaked overall — a loaf that has been in the oven five or ten minutes too long will naturally have a thicker, harder crust regardless of anything else. Use an internal thermometer and pull the loaf as soon as it hits 97–98°C / 207–208°F.

The fix: Reduce uncovered baking time by 5 minutes, rest the loaf in a still warm spot after baking, and use a thermometer to avoid overbaking.

Problem 7 — My Sourdough Has No Ear

The ear — that long raised ridge that runs along the score line and opens dramatically during baking — is the hallmark of well-made sourdough. It is also the thing most beginners are desperate to achieve and the thing that seems most elusive. Getting a consistent ear comes down to three things:

  • Scoring angle too steep — if you score straight down into the dough you create a cut that opens symmetrically rather than producing a flap that lifts. Score at a shallow angle — 30 to 45 degrees from horizontal — so the blade creates a thin surface flap. That flap is what becomes the ear.
  • Dough too warm when scored — warm dough is soft and tears rather than cutting cleanly. Cold dough holds its shape under the blade and produces a much cleaner, more dramatic score. Score your loaf straight from the fridge, before it has had any time to warm up at the counter.
  • Blade not sharp enough — a dedicated bread lame or a fresh disposable razor blade is ideal. A kitchen knife or scissors will drag the dough and produce a ragged score that does not open cleanly into an ear. The blade should glide through the surface in one smooth confident movement.

The fix: Score at a shallow 30–45 degree angle with a sharp lame or razor blade, working quickly and confidently on cold dough straight from the fridge.

Problem 8 — My Starter Smells Like Acetone or Nail Polish Remover

Hands feeding a sourdough starter with flour and water on a wooden kitchen counter with small digital kitchen scales visible in warm natural light

Opening your starter jar and being hit by a sharp chemical smell is alarming the first time it happens. But it is not a sign that your starter has gone bad or needs to be thrown away. It is a sign that it is hungry.

That acetone or nail polish remover smell is ethanol — alcohol that is produced when wild yeast runs out of food and starts breaking down in the absence of sugars to ferment. It means your starter has consumed everything you fed it and is waiting for more.

  • Feed your starter more frequently — if it is sitting at room temperature and smelling of acetone after 12 hours it needs twice-daily feeding rather than once daily
  • Increase the amount of flour and water at each feed — try a 1:2:2 ratio (one part starter, two parts flour, two parts water) to give it more food to work through
  • If your kitchen is very warm in summer, move the starter to a slightly cooler spot — a warm kitchen accelerates fermentation and means the starter exhausts its food supply faster
  • Stir the liquid that forms on top (called hooch) back into the starter before feeding rather than discarding it — this is not harmful and reduces waste

The fix: Feed more frequently and increase the flour and water ratio. The acetone smell will disappear within one or two feeding cycles once the yeast has fresh food to work with.

Problem 9 — My Sourdough Has Huge Holes in One Spot

A crumb that is wildly uneven — giant holes clustered in one area with dense, almost gummy sections elsewhere — looks dramatic but has a very simple cause. It is almost always a shaping problem, sometimes combined with flour pockets.

  • Loose or uneven shaping — when the dough is shaped without enough surface tension the gas that has built up during bulk fermentation redistributes unevenly inside the loaf during the final proof and baking. The result is large holes in some areas and density in others. Shaping is a skill that takes practice — focus on building even, consistent surface tension across the entire exterior of the loaf by dragging it toward you on an unfloured surface.
  • Flour trapped inside during shaping — if you use too much flour on the work surface during preshaping or shaping some of it inevitably gets folded into the interior of the dough. Pockets of flour inside the loaf create large holes when they bake out. Use as little flour as possible during shaping and keep the work surface lightly oiled instead if the dough is sticking.
  • Uneven stretch and folds — if your stretch and fold technique during bulk fermentation is creating uneven gas distribution, the loaf will bake unevenly. Focus on smooth, consistent folds that cover the entire surface of the dough rather than pulling one side more than the other.

The fix: Work on building even surface tension during shaping, use minimal flour on your work surface, and keep your stretch and fold technique smooth and consistent.

Problem 10 — My Sourdough Is Spreading Flat Instead of Rising Up

A loaf that flows outward into a wide flat disc rather than holding its shape and rising upward is a structural failure — the dough simply does not have enough strength to support its own weight during baking. It is one of the most disheartening problems to encounter because it usually only reveals itself when the loaf comes out of the oven.

  • Insufficient gluten development — gluten is the network of proteins that gives bread dough its structure and allows it to hold gas without collapsing. Without enough gluten development the dough is too slack to hold its shape. The solution is more stretch and fold sessions during bulk fermentation — aim for four to six sets in the first two to three hours, each set consisting of four folds around the bowl spaced 30 minutes apart.
  • Hydration too high for your current skill level — higher hydration doughs are inherently more challenging to shape and structure because the extra water weakens the gluten network. A 75% or 80% hydration dough that spreads flat is simply asking for more experience than a beginner has yet developed. Drop to 68% and master shaping at that hydration before working your way up.
  • Weak or under-active starter — a starter that is not fully active does not produce enough gas quickly enough during bulk fermentation to build the structure the loaf needs. The dough ferments partially, develops some strength, but collapses under its own weight during baking. This is why starter readiness is the foundation of everything — if yours is not reliably doubling after each feed it is not ready to leaven a loaf.
  • Over-proofed during final proof — a loaf that is left too long in the final proof loses its structural integrity before it gets to the oven. The gluten relaxes, the gas partially escapes, and what remains cannot support the loaf during baking. When in doubt bake a little earlier rather than later.

The fix: More stretch and folds during bulk fermentation, lower hydration while you are developing your shaping technique, and a stronger more active starter.

Frequently Asked Questions

How long does it take to fix a struggling sourdough starter?

Most starter problems resolve within two to five days of consistent daily feeding in a warm environment. The two variables that matter most are temperature and consistency — a starter fed at the same time every day in a genuinely warm spot will almost always come right within a week. If yours is not showing improvement after seven days of twice-daily feedings at 24–26°C / 75–79°F something more fundamental may need addressing — get in touch and we will help you work through it.

Should I throw away my starter and start again?

Almost never. Starters are remarkably resilient and most problems that look terminal are actually environmental. Before discarding your starter try moving it somewhere genuinely warm, switching to strong bread flour if you have not already, and feeding twice daily for five to seven days. The only situation that genuinely warrants starting again is if you see pink, orange, or red streaks in the starter — this indicates harmful bacterial contamination that cannot be fed out. Everything else is fixable.

Why does my sourdough taste different every time I bake it?

Because sourdough is a living, dynamic process that responds to its environment. The temperature of your kitchen, the ripeness of your starter on the day you bake, how long your bulk fermentation runs, the humidity in the air — all of these variables shift from bake to bake and all of them affect the final flavour. This variability is part of what makes sourdough so interesting to bake. It also becomes more predictable the more you bake — as you learn how your specific starter behaves in your specific kitchen across different seasons you will find yourself producing much more consistent results.

Do I need a Dutch oven to make good sourdough?

A Dutch oven is the single most effective piece of equipment a home sourdough baker can own because it solves the steam problem completely. But it is not the only solution. You can invert a large stainless steel bowl over your loaf on a baking stone for the first 20 minutes, or place an oven-safe dish of boiling water on the bottom rack to generate steam. These methods are less reliable than a Dutch oven but they work. If you bake sourdough regularly the Dutch oven is worth the investment — it makes every other aspect of the process easier.

Is it normal for sourdough to take so long?

Yes — and the long timeline is not a bug, it is a feature. The extended fermentation is what makes sourdough fundamentally different from commercial yeast bread. It develops the complex flavour, improves the digestibility of the gluten, and creates the open crumb structure that makes a good sourdough so satisfying to eat. A typical loaf runs 12 to 24 hours from mixing to baking — but the vast majority of that time is completely hands-off. You mix the dough, do your stretch and folds over a couple of hours, shape it, put it in the fridge, and come back to it the next day. The process fits around your life rather than demanding your constant attention.

How do I know when bulk fermentation is done?

This is one of the most important skills in sourdough and one that takes time to develop. The dough should look noticeably puffier than when you started — typically 50 to 75% larger in volume. The surface should have bubbles visible on it and the sides of the container should show bubble activity. The dough should feel lighter and more aerated when you handle it. The sides should be domed rather than flat. Do not rely solely on time — use the dough itself as your guide.

Final Thoughts

Every sourdough problem on this list is fixable. Not one of them means you are bad at baking, that your starter is beyond saving, or that sourdough is not for you.

Sourdough is a craft and crafts take repetition to develop. Your tenth loaf will be dramatically better than your first. Your twentieth will be better still. The bakers producing those stunning open crumb shots you see online — the ones with the perfect ear and the crackling crust and the gorgeous colour — got there by baking through exactly the same problems you are dealing with right now. Every single one of them has pulled a dense brick out of the oven and wondered what went wrong.

The difference between a beginner and an experienced sourdough baker is not talent. It is the willingness to keep going after a bad loaf, to adjust one variable at a time, and to pay close attention to what the dough is telling you with each bake.

Keep baking. Keep adjusting. The loaf you are trying to make is closer than you think.

📌

Bookmark this guide. Save it to your Sourdough Pinterest board so you can come back to it the next time something goes wrong — because something always does and it always helps to have the answer already saved.

Similar Posts

Leave a Reply

Your email address will not be published. Required fields are marked *