Sourdough Bread Without an Oven: The Complete Beginner’s Guide
I assumed for a long time that baking sourdough bread required a proper oven.
A Dutch oven inside a conventional oven, a specific temperature, a specific bake time — that was the only way I thought it worked.
Then my oven broke for three weeks and I discovered I was completely wrong.
The truth is that for millions of people around the world — particularly in South Asia, Africa, and parts of the Middle East — cooking without an oven is not a workaround. It is simply how cooking works. Bread, flatbreads, and baked goods have been made on stovetops, open fires, and clay griddles for thousands of years. The Western assumption that bread requires an oven is a relatively recent and fairly privileged one.
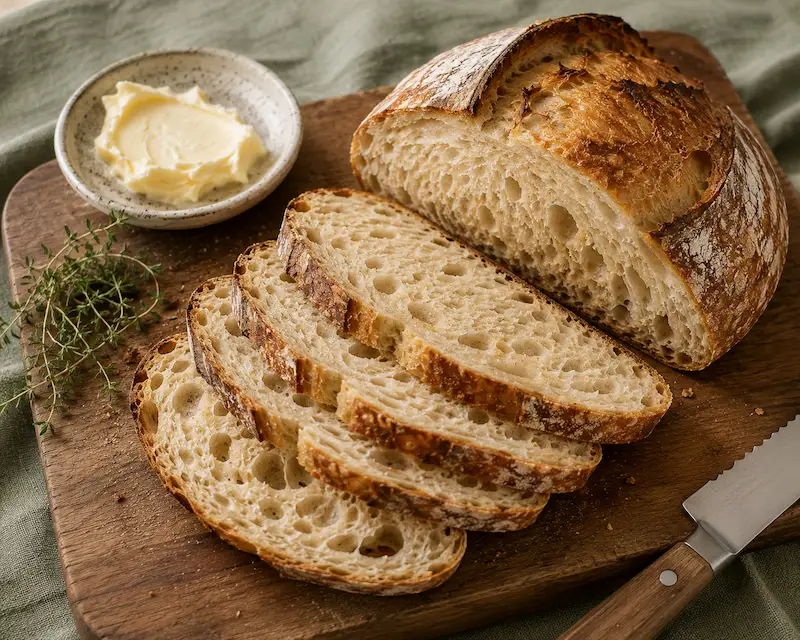
Sourdough bread without an oven is not only possible — it produces results that genuinely surprised me. A thick golden crust, an open chewy crumb, and that distinctive sourdough tang, all from nothing more than a cast iron skillet on a gas hob.
If you live in an apartment without an oven, are in a country where ovens are not a standard kitchen appliance, are trying to reduce your energy bills, or simply want to experiment with a different baking method — this guide is for you.
In this guide you will learn:
Can You Really Make Sourdough Without an Oven?
Yes — and the history of bread baking supports this completely.
For most of human history bread was not baked in electric or gas ovens. It was baked over open fires, on hot stones, in clay pots, and on griddles. The sourdough fermentation process that creates the flavour and rise of a sourdough loaf happens entirely before baking. The baking itself is simply the application of heat — and heat can come from many sources.
In countries across South Asia, Africa, the Middle East, and Latin America, stovetop cooking is the norm rather than the exception. Millions of home cooks produce extraordinary breads and baked goods every single day without ever turning on an oven. This guide draws on those traditions and adapts them for sourdough specifically.
What makes stovetop sourdough work is the combination of:
What You Need
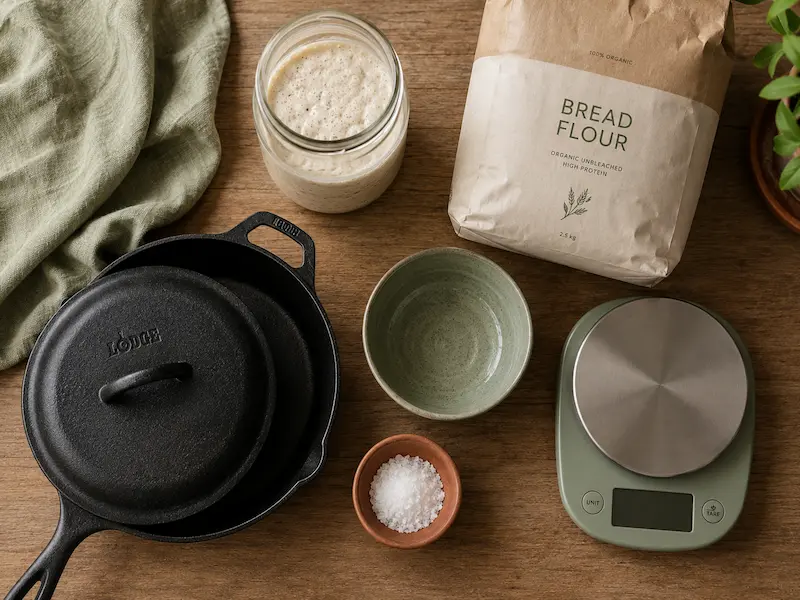
You do not need much to get started. Here is exactly what works best.
Cast iron skillet with a lid — this is the single most important piece of equipment. Cast iron holds heat exceptionally well and the lid traps the steam that creates a good crust. A 25 to 30 centimetre skillet is ideal for a standard sized loaf.
Kitchen scale — sourdough baking is precise. Measuring by weight rather than volume gives consistent results every time.
Large mixing bowl — for mixing and fermenting the dough.
Banneton or proving basket — optional but helpful for shaping. A bowl lined with a well-floured tea towel works just as well and costs nothing.
Dough scraper — makes handling wet dough much easier and costs almost nothing.
If you do not have a cast iron skillet a heavy based stainless steel pan with a lid works reasonably well. In South Asian kitchens a pressure cooker or heavy degchi works very well — the thick base and tight lid create excellent baking conditions. Avoid thin aluminium pans — they conduct heat unevenly and will burn the base of your loaf before the inside is cooked through.
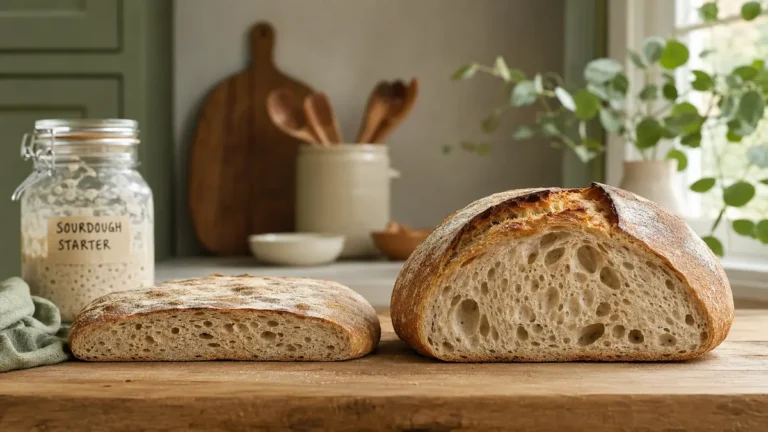
Making Your Sourdough Starter
Before you can bake sourdough bread you need an active sourdough starter — a living culture of wild yeast and bacteria that provides the rise and flavour distinctive to sourdough.
If you already have an active starter skip ahead to the recipe. If you are starting from scratch this process takes seven to fourteen days but requires only five minutes of attention per day.
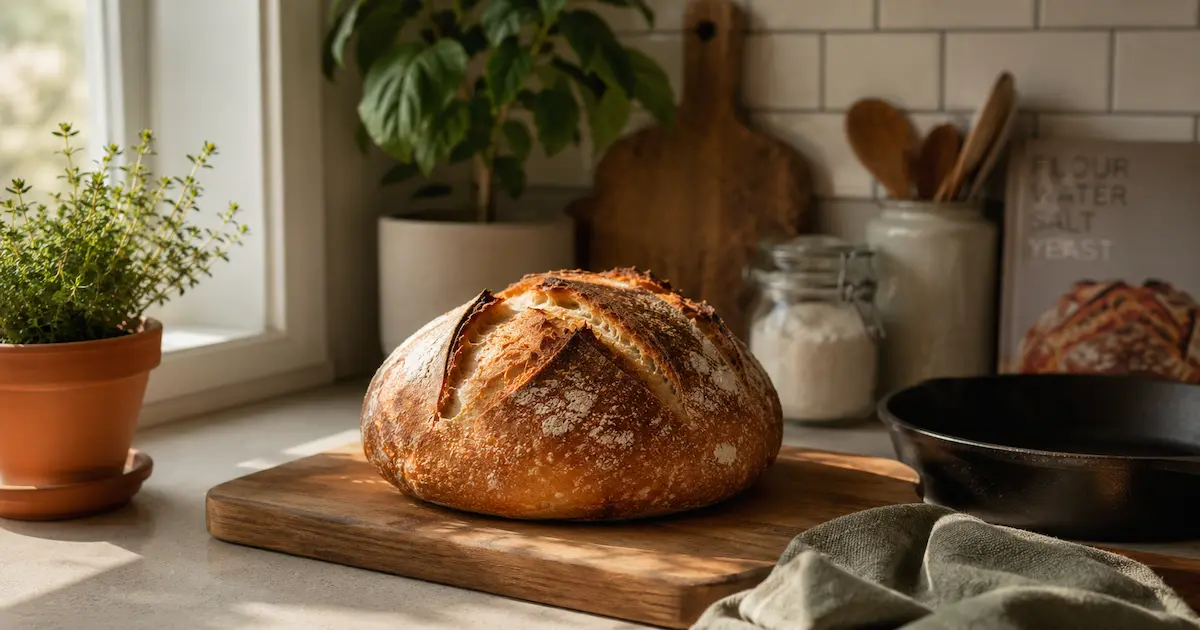
The Basic Stovetop Sourdough Recipe
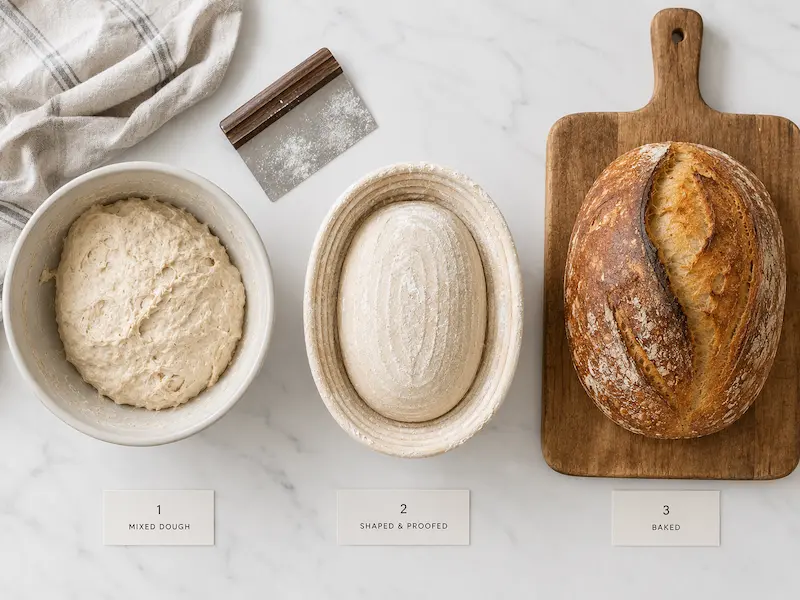
This recipe produces one medium loaf — enough for four to six portions. The total time is around 24 hours but active work is less than 30 minutes.
Three Stovetop Methods Compared
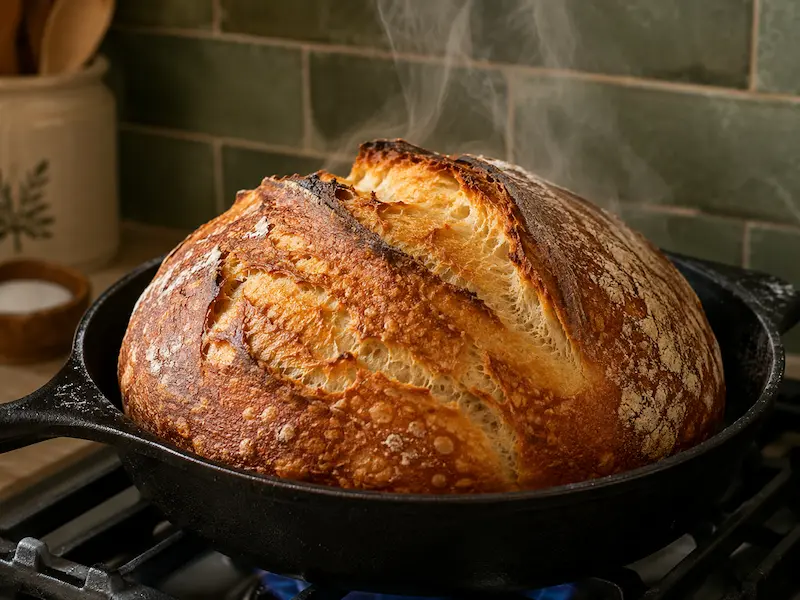
Method 1 — Cast Iron Skillet with Lid
This is the method described in the recipe above. The cast iron retains heat beautifully and the lid traps steam effectively. Produces a loaf with a genuine crust and open crumb. The best all-round option for most apartment bakers anywhere in the world.
Method 2 — Tawa or Flat Griddle
In many South Asian, African and Middle Eastern households a tawa or flat griddle is the primary cooking surface. This method was developed for exactly that context and produces excellent results with equipment that millions of home cooks already own.
Place the shaped dough directly on a warm tawa over low heat. Cover with an inverted pot or large bowl to trap steam. Cook for 20 minutes covered then 10 minutes uncovered. The result is a flatter, wider loaf with sourdough flavour and texture — different from a conventional loaf but genuinely delicious.
Method 3 — Dutch Oven or Heavy Pot on Hob
Preheat a Dutch oven or heavy degchi on the hob for 10 minutes on medium heat. Carefully lower the shaped dough into the hot pot. Score, cover, and cook on low heat for 30 minutes. Remove the lid and cook for a further 15 to 20 minutes. This method produces the best results of the three because the thick walls and tight lid create the most consistent baking environment.
Troubleshooting Common Problems
Loaf is burnt on the bottom but raw in the middle
Your heat is too high. Reduce to the lowest possible setting and use a heat diffuser if available. A folded damp tea towel placed under the pan also helps reduce direct heat.
Loaf is not rising properly
Your starter may not be active enough. Perform the float test before baking. If it sinks feed your starter twice daily for two to three days before attempting to bake again.
Crust is soft and pale
Not enough steam was trapped during the first phase of baking. Make sure your lid fits as tightly as possible. You can also add a tablespoon of water to the pan when you put the lid on to create extra steam.
Bread is too dense
The most common causes:
Tips for the Best Stovetop Sourdough
How to Store Stovetop Sourdough
Sourdough keeps better than commercially yeasted bread because of its natural acidity.