How to Make Milk Kefir at Home (No Special Equipment Needed)
If you’ve ever paid five dollars for a small bottle of kefir at the grocery store, you already know it’s one of those foods that feels overpriced for what it is: fermented milk in a bottle. Learning how to make milk kefir at home flips that math entirely. A packet of live kefir grains costs about the same as one store-bought bottle, and those grains keep producing kefir for years, not days.
Milk kefir is thinner than homemade yogurt, tangier, and loaded with a wider range of probiotic strains because of how it’s cultured. Unlike yogurt, which needs a controlled temperature and several hours in an oven or yogurt maker, kefir grains just need a jar, milk, and room temperature. That makes this one of the easiest fermentation projects to run in a small kitchen, with no incubator, no thermometer, and no counter space beyond a single jar.
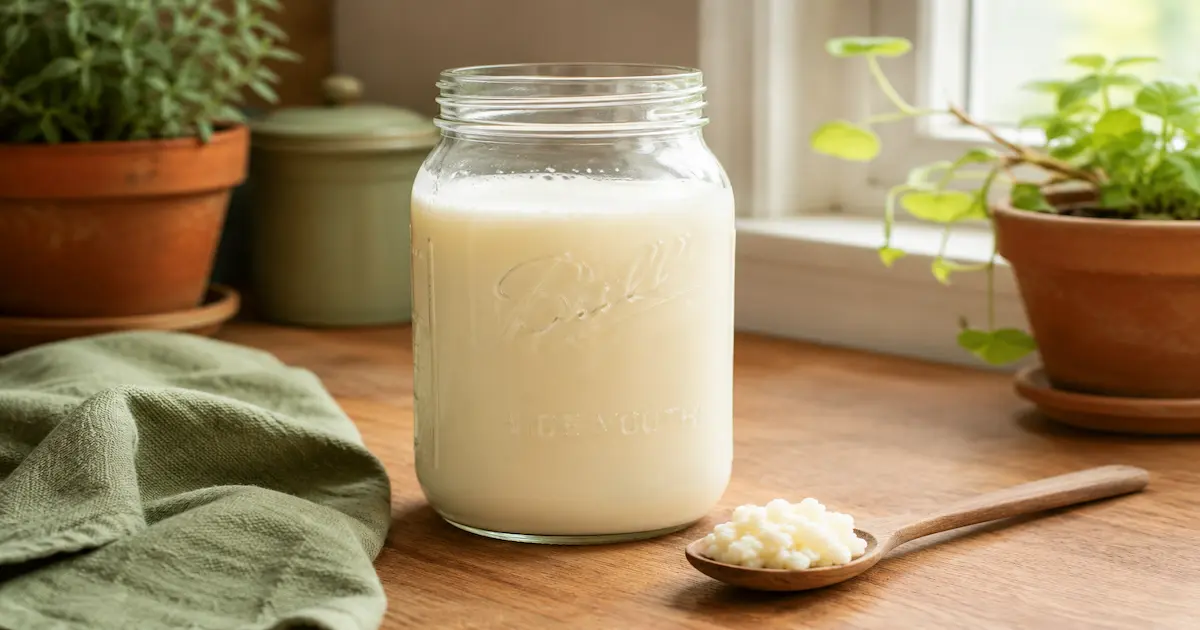
What Milk Kefir Grains Actually Are
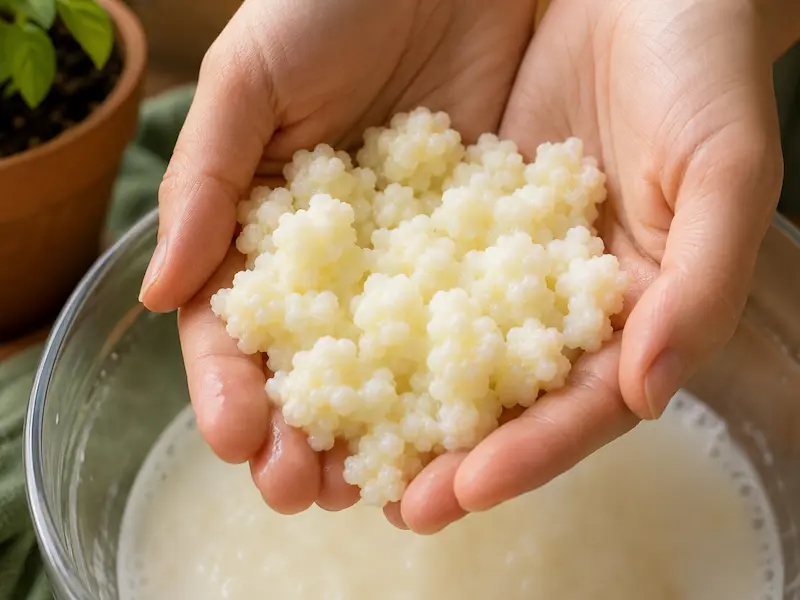
Kefir grains aren’t grains in the cereal sense. They’re a symbiotic colony of bacteria and yeast, often called a SCOBY, similar in concept to a kombucha SCOBY, though the organisms involved are different. The “grains” look like small, slightly gelatinous cauliflower florets, usually white or pale yellow, held together by a matrix of polysaccharides the microbes themselves produce. That matrix is why grains can be scooped out whole with a spoon instead of dissolving into the milk.
Inside that matrix live dozens of species working in tandem: commonly Lactobacillus, Lactococcus, Leuconostoc, and Streptococcus bacteria alongside yeasts like Saccharomyces and Kluyveromyces. The bacteria consume lactose and produce lactic acid, which is what sours and thickens the milk. The yeasts feed on some of that same sugar and produce small amounts of carbon dioxide and alcohol, which is where kefir’s faint fizz and slightly yeasty smell come from, something yogurt never develops since it relies on bacteria alone. This mixed population is also why kefir tends to have a broader range of microbial strains than most yogurt, and why the flavor is more complex: sour, faintly bready, occasionally a little sharp depending on ferment time.
Because the grains are a living colony rather than a single-organism culture, they behave more like a pet than an ingredient. They adapt to their environment over several batches. A grain colony that’s been fed the same milk at the same temperature for months will culture faster and more predictably than one that’s just been through a shipping box and a week of neglect. Expect your first two or three batches to be inconsistent while the colony resets to your kitchen’s conditions.
You can buy live kefir grains online or from a local fermentation-focused seller; a small active culture, usually a tablespoon or two, is enough to start. Dehydrated grains are also available and cheaper, but they take one to two weeks of daily feedings to fully reactivate before they’ll culture milk reliably. During reactivation, don’t drink the early batches, since they’re often weak, watery, and not yet representative of what the colony will eventually produce. Budget for that lag if you go the dehydrated route, and don’t judge the flavor of your setup until at least the second week.
What You’ll Need — And Why Each Choice Matters
1–2 tablespoons active milk kefir grains. More grains relative to milk means faster fermentation; less means slower. There’s no strict ratio to hit, but 1 tablespoon per 2 cups is a workable starting point you can adjust once you see how your kitchen behaves.
2 cups whole milk. Whole milk gives the fullest flavor and feeds the colony best because of its fat and protein content, but the grains will work in 2% or skim too, just expect a thinner result. Avoid ultra-pasteurized (UHT) milk if you can. The higher heat treatment breaks down proteins in a way that seems to make the milk harder for grains to culture well over time, and long-term use of UHT milk is a common cause of grains slowly losing vigor. Raw milk works but ferments faster and less predictably, since it’s already carrying its own bacteria.
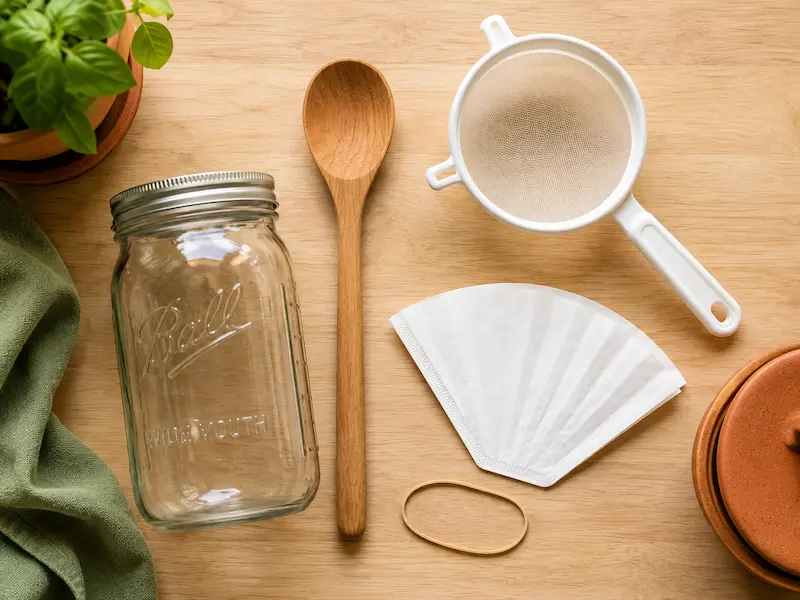
A clean glass jar. A quart mason jar is the standard choice because it’s wide enough to strain into easily and inert, so it won’t react with the lactic acid the way some metals can. Plastic works in a pinch but scratches easily, and scratches become long-term homes for bacteria that are harder to fully clean out.
A breathable cover — coffee filter, paper towel, or thin cloth secured with a rubber band. This isn’t optional aesthetic advice. Kefir fermentation produces a small amount of CO2, and a sealed lid can trap enough pressure to make opening the jar messy, or in rare cases even pop the seal. A breathable cover lets gas escape while still keeping dust and fruit flies out.
A plastic or wooden spoon and a plastic or nylon mesh strainer. The concern with metal isn’t a one-time exposure; a stainless steel spoon for a few seconds won’t harm anything. The issue is prolonged contact, like straining through a metal mesh sieve repeatedly over weeks, which can react with the lactic acid and, by some accounts, gradually affect grain health. Plastic and wood sidestep the question entirely, which is why most kefir-makers default to them rather than testing the limit.
The Basic Method
1. Combine grains and milk. Add your kefir grains to the jar, then pour in the milk. The ratio doesn’t need to be exact; somewhere around 1 tablespoon of grains per 2 cups of milk is a reasonable starting point, though more grains will culture the milk faster.
2. Cover and set aside. Use a breathable cover rather than a sealed lid. Kefir doesn’t need to be airtight the way some ferments do, and a sealed jar can build up pressure from the yeast activity.
3. Let it sit at room temperature for 24 hours. Somewhere between 68–78°F is the sweet spot, since that’s the range where the bacteria and yeast in the colony are both active without one outcompeting the other. Below 68°F, fermentation slows dramatically. The bacteria in particular become sluggish, so you’ll get a thinner, less sour result even after a full day. Above 78°F, the yeast tends to speed up faster than the bacteria, which can throw off the balance and push the kefir toward a sharper, more alcoholic flavor before it’s properly thickened. In a warmer apartment, kefir can be ready in 18 hours; in a cooler one, it might take closer to 36. You’re looking for the milk to thicken slightly, smell tangy like buttermilk, and possibly show a few small bubbles clinging to the inside of the jar, which is the yeast doing its work.
4. Strain the grains out. Pour the kefir through your plastic strainer into a separate container, using the spoon to gently press the liquid through without crushing the grains. The grains stay in the strainer; the finished kefir goes into your container for drinking or flavoring. If the kefir has thickened unevenly, thinner near the top and thicker near the bottom, give the jar a gentle swirl before straining rather than shaking it hard, which can break up the grains unnecessarily.
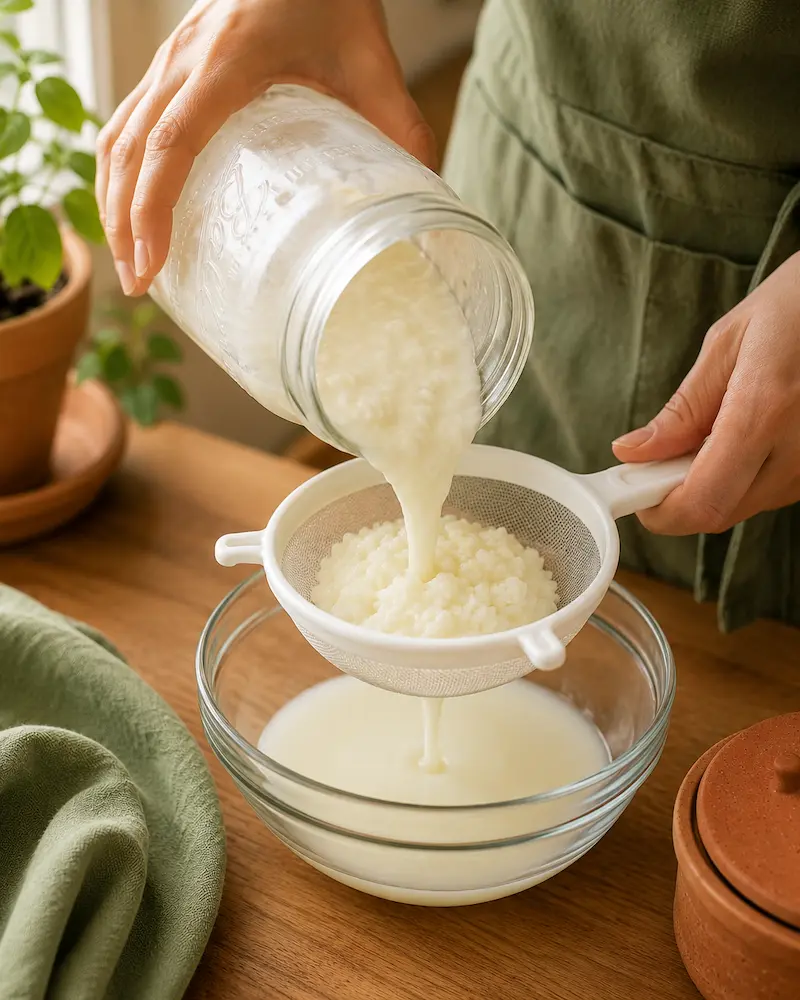
5. Start the next batch immediately. Put the strained grains into a fresh jar with new milk right away. This is what keeps the culture alive: once the lactose in a batch is mostly consumed, the colony has nothing left to feed on, and grains left sitting in spent kefir too long begin to lose vigor, the same way any live culture struggles once its food source runs out. If you can’t start a new batch right away, refrigerating the grains in a small amount of milk buys you a few days, but treat same-day refreshing as the default habit, not the exception.
Troubleshooting Common Problems
My kefir separated into curds and clear liquid (whey). This means it fermented too long, usually past 24–30 hours in a warm kitchen. It’s not spoiled. You can stir it back together, or strain off the whey and use the thicker curds like a soft cheese. Next batch, strain earlier.
My kefir isn’t thickening at all after 24 hours. Usually a temperature issue: if your kitchen runs below 68°F, fermentation slows significantly. Move the jar somewhere warmer, like on top of the refrigerator or inside a turned-off oven with the light on. It can also mean the grains are still building back strength after a rest period or a switch to dehydrated grains. This is one of the most common snags people run into when learning how to make milk kefir for the first time, so don’t take it as a sign you’ve done something wrong.
There’s a strange smell, not sour, but off. Kefir should smell tangy and slightly yeasty, similar to plain yogurt or buttermilk. A sharp alcohol smell means it fermented too long. An unpleasant, rotten smell (rare, but possible with contamination) means it’s best to discard that batch and rinse the grains before starting fresh with a clean jar.
My grains seem to be shrinking or not growing. Grains grow at different rates depending on milk type, temperature, and how often they’re fed. Whole milk grows them faster than low-fat milk. If they’re shrinking rather than just growing slowly, check that you’re using fresh milk each batch and that the jar and tools are getting rinsed with plain water, not soap residue, between uses.
Flavoring Your Kefir (Second Ferment)
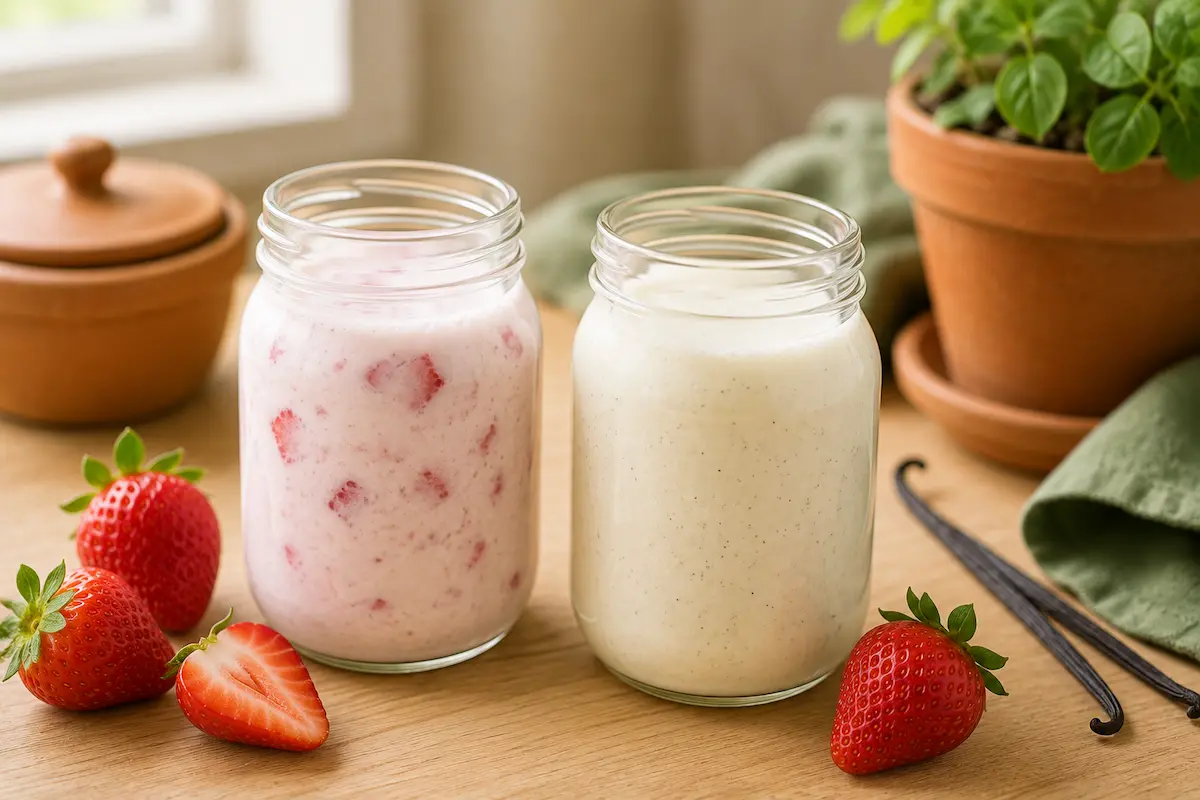
Plain kefir is fairly sour, which not everyone loves straight out of the jar. A second ferment softens that: after straining the grains out, pour the plain kefir into a clean jar with a few tablespoons of chopped fruit, a spoonful of jam, or a splash of vanilla. Seal it and let it sit at room temperature for another 12–24 hours, then strain out any fruit solids and refrigerate. This step also builds a bit of natural carbonation, since the added sugars give the yeast something extra to work with in a sealed container. Just crack the lid once during the process to release pressure. If you already keep a jar of sourdough discard recipes in rotation, a fruit-flavored kefir makes a natural pairing for a weekend breakfast alongside sourdough pancakes.
Why Your Batches Won’t Be Identical
Once you’ve made a few batches, you’ll notice kefir isn’t as consistent as, say, boiling water. That’s normal, and it comes down to a handful of variables stacking on top of each other:
Grain-to-milk ratio. As your colony grows, the same 24-hour window will produce a stronger, more sour kefir than it did when the colony was smaller. You’re effectively increasing the ratio without changing anything else.
Milk fat content. Switching between whole and low-fat milk, even occasionally, changes texture noticeably. Fat slows down how quickly the grains can access lactose, so higher-fat milk tends to ferment slightly slower but yields a creamier result.
Ambient temperature swings. A kitchen that’s 72°F in the morning and 78°F by evening, common in apartments without central air, means the same “24 hours” isn’t really a fixed unit. It’s closer to 24 hours at a fluctuating rate.
How recently the colony was disturbed. Straining, moving, or refrigerating grains resets them slightly each time. A batch made the day after a week in the fridge will usually be milder than one made mid-routine.
None of this means something’s wrong. Kefir is a living process, not a recipe with fixed inputs, and small variation batch to batch is a sign the colony is alive and responding to its environment rather than a sign you’re doing something incorrectly.
What Happens as Your Grain Colony Grows
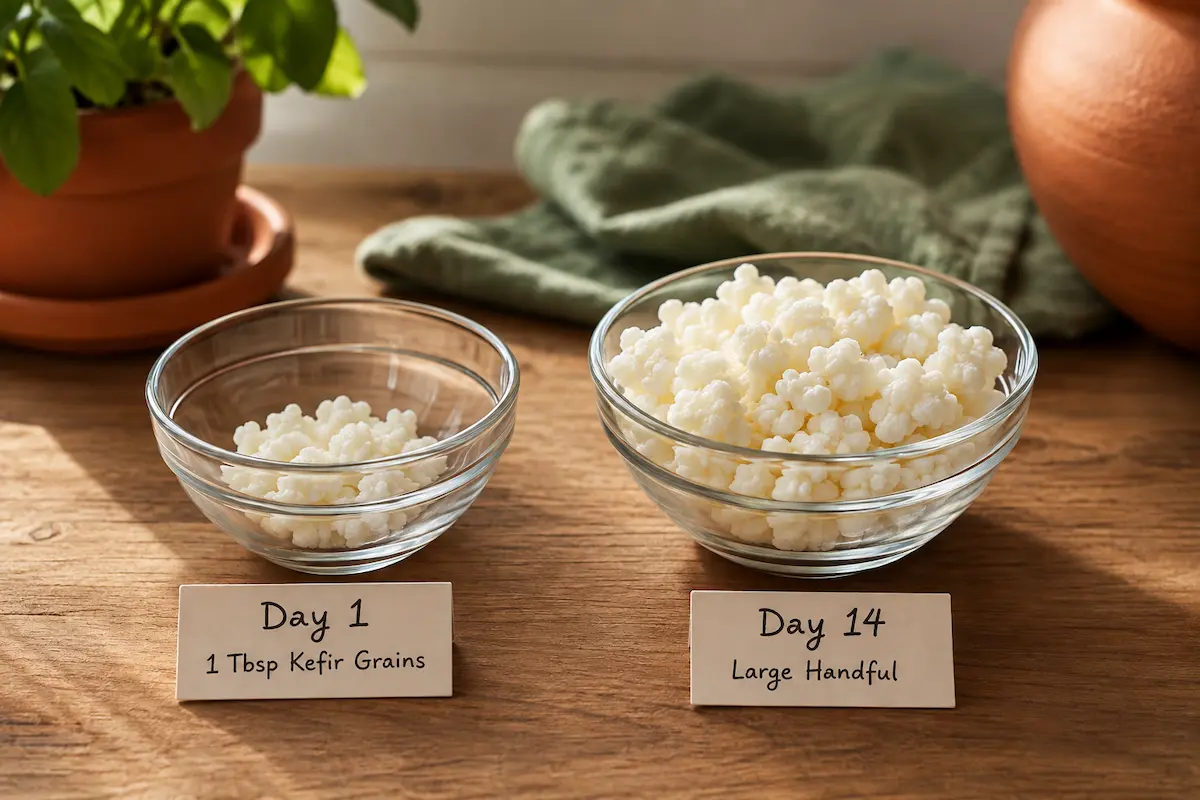
Kefir grains multiply as they ferment, slowly at first, more noticeably after a month or two of regular use. You’ll start to notice the volume of grains in your strainer creeping up each week. This is expected, and honestly, it’s the main long-term maintenance question people run into once they’re past the beginner stage.
Once your grains outgrow what a 2-cup batch needs, generally once you’re working with more than about 3–4 tablespoons, you have three options: scale up to a larger jar and more milk, split the colony and start a second jar, or remove and set aside the extra grains. Extra grains don’t need to go to waste. They can be rinsed and eaten directly (some people add them to smoothies), composted, or given to someone else who wants to start their own kefir practice. A colony can keep growing indefinitely if you feed all of it, so deciding on a ceiling early, like “I only want enough for 2 cups a day,” saves you from ending up with a jar that demands more milk than you actually drink.
Storing Kefir and Grains
Finished kefir keeps for about one to two weeks in the refrigerator, though it will continue to slowly ferment and get more sour over time. If you want to pause your kefir-making, going on a trip, for example, you can refrigerate the grains directly in a jar of milk for up to a week or two without feeding them daily. For longer breaks, grains can be dehydrated or frozen, though reactivating them afterward takes some patience.
A Realistic Rhythm for Apartment Living
The biggest adjustment when starting out isn’t the process itself; it’s remembering it exists on your counter every day. Milk kefir works well with a routine: strain and refresh it each morning alongside making coffee, or each evening when you’re already in the kitchen. Once it’s part of a daily habit, the actual hands-on time is under five minutes. That’s really the heart of how to make milk kefir sustainably long-term: less about technique, more about building it into something you already do.
If kefir is your first step into apartment homesteading more broadly, our guide to apartment homesteading covers where to go next, or start from our Start Here page for the full lay of the land. If you’re in a fermenting mood, our easy kimchi recipe is another quick small-jar project, and if you keep sourdough discard on hand, our sourdough discard pancakes make a good weekend pairing with a fresh batch of kefir.
Frequently Asked Questions
Is milk kefir the same as kombucha?
No — kombucha ferments sweetened tea using a different culture (a kombucha SCOBY), while milk kefir ferments dairy using kefir grains. They share the general idea of a live culture doing the fermenting, but the organisms, process, and end product are different.
Can I use non-dairy milk?
Kefir grains are adapted to feed on lactose, so they’ll weaken over time in non-dairy milk. If you want to make dairy-free kefir regularly, it’s worth keeping a separate set of water kefir grains instead. See our water kefir recipe for the dairy-free version of this same process.
How much kefir should I drink?
There’s no official serving size, but most people start with a quarter to half a cup and work up from there, since introducing a lot of probiotics at once can cause digestive adjustment for a few days.
Do I need to buy new grains regularly?
No. Healthy kefir grains grow and multiply with each batch. Many people end up with more grains than they need and share or compost the extra.
Why does my kefir taste different from one batch to the next?
This is normal and comes down to small shifts in temperature, how long it fermented, and how large your grain colony has grown (see the section above on batch variation). If the flavor swings from mild to sharply sour within a day or two of otherwise identical conditions, it usually just means the room temperature changed more than you realized.
Can I make kefir with less than 24 hours of fermenting?
Yes. Some people prefer a shorter, milder ferment of 12–18 hours, especially in warmer climates. The tradeoff is a thinner texture and a less developed sour flavor, since the bacteria haven’t had as much time to work through the lactose. There’s no rule that says 24 hours is required; it’s just a common starting benchmark.