Fermented Hot Sauce Recipe — Pepper Mash and Brine Methods
Fermented hot sauce uses the same lactic-acid-bacteria process behind sauerkraut and kimchi — salt draws out moisture and creates an environment where beneficial bacteria outcompete anything harmful, converting natural sugars into lactic acid over one to several weeks. The result, once blended into a sauce, has a rounder, tangier, more complex flavor than a straight vinegar-based hot sauce, because the acidity built up gradually through fermentation instead of being added all at once from a bottle.
If you’ve fermented anything else on this site before, most of what you already know transfers directly here — submersion, weights, watching for kahm yeast versus mold — just applied to peppers instead of cabbage or cucumbers.
Mash or Brine — The First Decision
There are two ways to ferment the peppers before they become sauce, and neither is more “correct.”
Mash: peppers (and any garlic, onion, or carrot you’re including) get roughly chopped and blended or processed with salt directly, then packed into a jar. This produces a thicker, more full-bodied finished sauce and is closer to how most commercial hot sauce brands actually ferment.
Brine: whole or roughly chopped peppers sit submerged in a separate salt-and-water solution instead. This produces a thinner sauce once blended, and it’s a slightly more forgiving starting point if you’re newer to fermenting, since the ratio is easier to measure precisely than salting a dense mash evenly by hand.
This recipe uses the mash method, since it’s the more common choice for hot sauce specifically, with notes on how to adapt to brine if you’d rather use that approach instead.
Ingredients
| Ingredient | Amount |
|---|---|
| Fresh chili peppers, stems removed | 1 lb |
| Garlic cloves, peeled | 3-4 |
| Non-iodized salt | 2-3% of total pepper weight (see below) |
| White vinegar or apple cider vinegar, optional | ¼ to ½ cup per pound of peppers |
Start with a milder, more affordable pepper like Fresno or jalapeño rather than jumping straight to habanero or ghost peppers for a first attempt — the fermentation technique is identical regardless of heat level, and it’s easier to judge whether a batch tastes right when it isn’t overwhelmingly hot. Once you’ve got a couple of successful mild batches under your belt, the same method scales to anything you want to grow or buy. If you’re growing your own, the balcony vegetables guide covers what does well in containers, peppers included.
Salt should be measured as a percentage of the peppers’ total weight, not by the spoonful — 2 to 3% is the standard range. For 454g (1 lb) of peppers, that’s roughly 9 to 14g of salt. Peppers vary more in water content than most vegetables, which makes weighing the salt more worthwhile here than it would be for something like fermented pickles, where the same weight-based principle applies but with more forgiving margins.
Making the Mash
Rough-chop the peppers and garlic, then pulse in a food processor until finely chopped but not fully liquefied — you’re aiming for a coarse mash, not a purée at this stage. Sprinkle the measured salt over the top and mix thoroughly so it’s evenly distributed throughout.
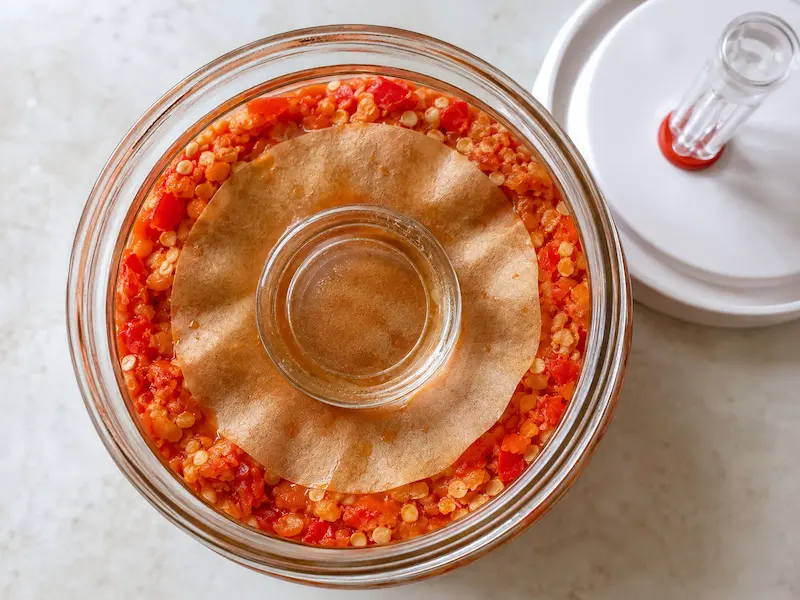
Pack the mash tightly into a clean jar, pressing down firmly as you go to eliminate air pockets — any trapped air is a spot mold can start. Press a piece of parchment cut to the jar’s diameter directly onto the surface of the mash (a cartouche), which helps seal out air even more than a weight alone would on a mash this dense. Top with an airlock lid if you have one, or a loosely fitted regular lid you’ll burp daily to release built-up gas.
Fermenting
Set the jar somewhere between 65-72°F, out of direct sunlight, for 2 to 4 weeks. Expect visible bubbling within the first week, with the flavor mellowing and rounding out through weeks two and three. Cloudy liquid, small bubbles, and a color shift are normal signs of active fermentation, not problems.
A batch is ready when the smell has shifted from sharp and purely spicy to something tangier and more rounded — genuinely fermented rather than just salted. If you want to confirm rather than go by smell alone, a pH strip or meter reading below 4.0 is a reliable sign the fermentation has produced enough acid to be both flavorful and safely stable.
Blending, Thickness, and Finishing
Transfer the fermented mash to a blender and purée until smooth, adding a splash of the jar’s liquid if it needs loosening up. Thickness is entirely adjustable from here: strain through a fine-mesh sieve for a thin, pourable sauce closer to a classic vinegar-style hot sauce, or leave it unstrained for a thicker, more textured sauce closer to a sriracha consistency. If a strained sauce turns out thinner than you’d like, blend in a bit more of the reserved solids rather than reaching for a thickener — the pepper mash itself is doing that job in a naturally fermented sauce, not a gum or starch.
This is also the point where vinegar becomes a real decision rather than an afterthought. Adding vinegar — ¼ to ½ cup per pound of original peppers, roughly 25-50% of the total volume — does two things: it balances the flavor with brighter acidity, and it meaningfully slows further fermentation, which is what keeps a bottled sauce from continuing to build pressure and potentially popping its cap in the fridge. A sauce left without any added vinegar stays a fully live ferment and will keep slowly fermenting in the bottle — not dangerous, but worth expecting if you skip this step, and worth burping the bottle occasionally as a result.
Flavor Variations
The base method holds regardless of what you build into it — these are additions to fold in at the mash stage, not separate recipes:
- Fruit-forward: add ½ cup chopped mango, pineapple, or peach to the mash before fermenting for a sweeter, fruitier sauce that pairs well with milder peppers like habanero rather than something already very hot.
- Smoky: a teaspoon of smoked paprika or a couple of dried chipotle peppers rehydrated and blended in gives a barbecue-adjacent depth without changing the fermentation process at all.
- Vegetable-mellowed: a chopped carrot and onion in with the peppers rounds out the heat and adds body — a common move in milder, more all-purpose hot sauces rather than ones meant to be aggressively spicy.
- Herb-forward: cilantro or fresh dill blended in at the finishing stage (not fermented with the mash, added after) gives a greener, fresher finish, closer to a salsa verde than a classic red hot sauce.
What to Do With the Leftover Mash and Brine
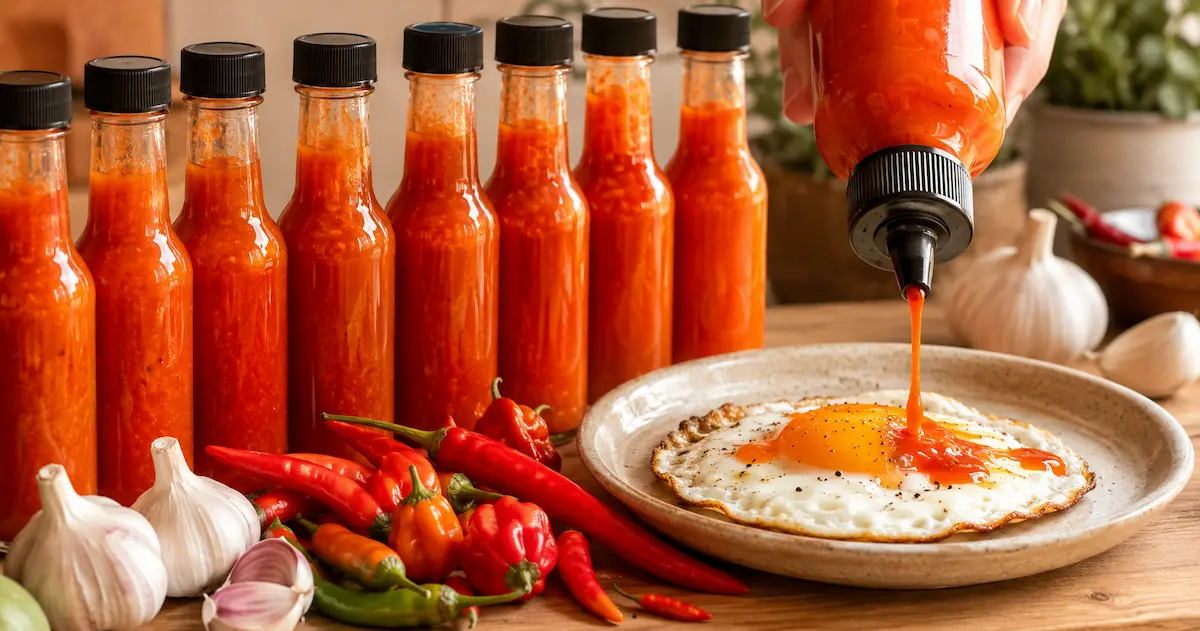
Don’t discard the leftover strained solids or brine if you strained for a thin sauce. The thicker pepper mash left behind works as a chunky condiment on its own — spooned onto eggs or tacos exactly as-is, no further blending needed. Any leftover brine adds a salty, sour, spicy kick to soups, marinades, or Bloody Marys, the same way brine from any other ferment on this site does double duty rather than going down the drain.
Bottling and Storing
Funnel the finished sauce into clean glass bottles and refrigerate. With vinegar added, it keeps well for 6 to 12 months refrigerated. Without vinegar, plan on a somewhat shorter window and expect continued mild fermentation activity in the bottle.
Where This Goes Wrong
| Problem | Likely cause | Fix |
|---|---|---|
| Fuzzy, colored growth on the surface | Actual mold, usually from trapped air pockets or exposed mash above the brine line | Discard the batch; pack more tightly and use a cartouche plus weight next time |
| Thin white film, no color or fuzz | Harmless kahm yeast | Skim it off and continue |
| Bottle building pressure or leaking in the fridge | No vinegar added, so the sauce is still actively fermenting | Burp the bottle periodically, or blend in vinegar to slow it down |
| Flavor tastes flat, more salty than tangy | Fermentation stopped too early | Give it the full 2-4 weeks; check for a pH below 4.0 if unsure it’s actually done |
| Sauce too thin even after straining less | Too much liquid blended in relative to solids | Blend in more of the reserved pepper solids rather than adding a thickener |
FAQ
Do I need to cook the sauce to make it shelf-stable?
No — a quick simmer will stop the fermentation and is an option if you prefer, but it also destroys the live probiotics that made it a fermented sauce in the first place. Vinegar is the more common way to stabilize it while keeping the sauce raw and live.
Can I use this method with peppers from my own garden?
Yes — any fresh chili pepper works, and homegrown peppers ferment identically to store-bought ones. The balcony vegetables guide has notes on growing peppers in containers if you’re not already.
What’s the white film on top of my mash?
Kahm yeast, a harmless surface film that can appear on almost any salt ferment — skim it off and keep going.
Mash or brine — which should a beginner start with?
Either works, but brine is slightly easier to measure precisely for a first attempt, since you’re working with a simple water-and-salt ratio rather than salting a dense mash evenly by hand — the same logic behind the fermented pickles recipe on this site.
Can I control how spicy the finished sauce is?
Yes, in two ways — start with a milder pepper variety, or blend in a mellowing vegetable like carrot or onion at the mash stage. Fermentation itself doesn’t meaningfully change the heat level; that’s set by the pepper you choose.
Why did my sauce turn out thinner or thicker than I expected?
Straining removes solids for a thinner sauce; skipping it or blending back in reserved solids thickens it. It’s fully adjustable after fermentation, not something you need to get right upfront.
Keep Fermenting
Start with sauerkraut
Just cabbage and salt — the easiest way to learn the same lacto-fermentation principles behind this hot sauce.
Sauerkraut Recipe →Try kimchi instead
A spicier, more complex vegetable ferment ready in about two days.
Easy Kimchi Recipe →A milder salt ferment
Same salt-brine method as this hot sauce, just with cucumbers instead of peppers.
Fermented Pickles Recipe →The full fermentation picture
Fermentation is one of six apartment homesteading skill areas — see how it all connects.
Apartment Homesteading Guide →