How to Make Sourdough Bread at Home (Complete Beginner’s Guide)
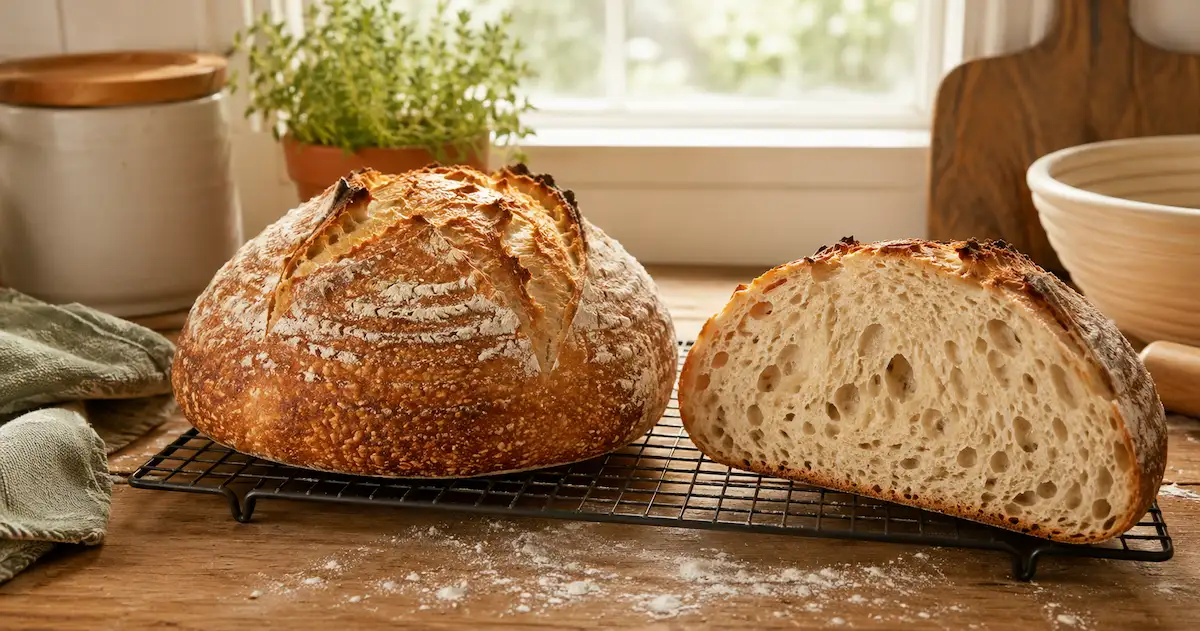
Your first loaf is a coin flip. Follow the same steps twice and you can end up with two different results — one loaf tall and open, the next squat and tight. That's not a flaw in the method. It's what happens when the main ingredient is a living culture that behaves differently depending on your kitchen, your flour, and how it was fed that morning.
This guide covers the full arc of how to make sourdough bread: mixing, a stretch-and-fold routine that replaces kneading, an overnight rise in the fridge, shaping, and baking inside a covered pot hot enough to crackle the crust. It also covers what most beginner guides skip — why the technique works, how to store the loaf once it's baked, and where to take it once the basic version is easy.
You'll need an active, doubling starter before any of this works. If yours isn't built yet, the sourdough starter guide walks through getting one going from flour and water alone, day by day.
Five words you'll see throughout this guide
Confirm the starter before you touch the flour
Feed the starter four to eight hours before mixing. At peak, it should have roughly doubled, hold a domed shape rather than sinking flat, and smell tart and yeasty — think yogurt, not paint thinner. A starter that's still flat, hasn't budged, or smells sharply of alcohol needs another cycle before it goes anywhere near dough.
The float test works as a rough gauge — drop a spoonful in water, and if it floats, there's enough gas built up. But a starter that floats once and hasn't been doubling on a predictable schedule isn't there yet either. If your starter is consistently sluggish, that's almost always the root cause behind a dense loaf — the starter guide's troubleshooting section covers exactly what to do about hooch, no activity, and the nail-polish smell.
What goes into the dough
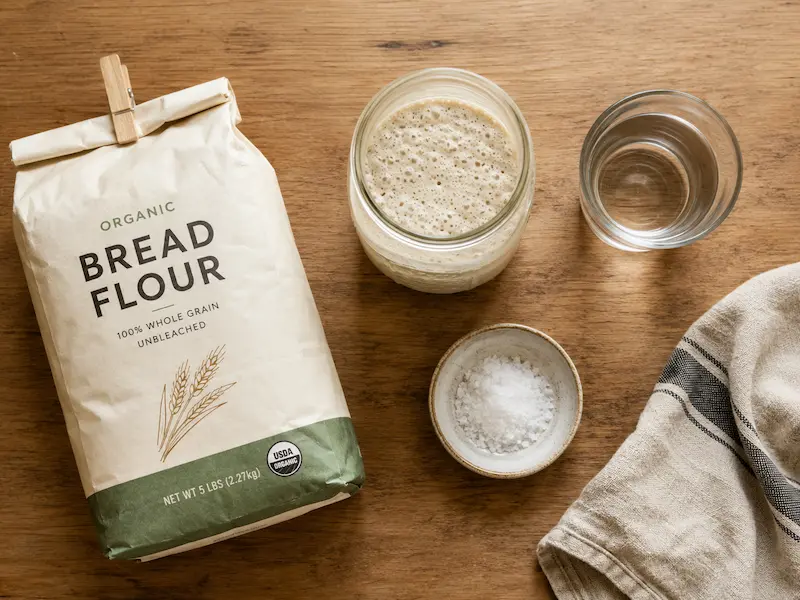
That works out to about 70% hydration — a manageable ratio for a first loaf. Wetter doughs open up more but get harder to shape.
Use a kitchen scale, not cups. This is the single biggest reason two people following the same recipe get different results. A cup of flour can weigh anywhere from 120g to 150g depending on how it's scooped, which quietly shifts the hydration by 10% or more. A scale makes the ratio above actually mean something; measuring cups turn it into a guess.
Making a smaller loaf: to halve this recipe, use 250g flour, 175g water, 50g starter, 5g salt — or follow the dedicated small batch sourdough guide if you want a version written specifically for that size. Timing, folds, and bake temperature all stay the same; only the bake time shortens slightly, by about 5 minutes under the lid and 5 minutes with it off.
Equipment: a large bowl, a kitchen scale, a bench scraper or stiff spatula, a banneton (or a bowl lined with a floured towel), a Dutch oven with a lid, and a lame, razor blade, or sharp paring knife for scoring.
Mixing and building strength
If you mix around 6pm, here's roughly how the next day breaks down.
6:00pm — Autolyse. Combine just the flour and water. Stir until no dry patches remain. Cover and let it sit 30 to 60 minutes.
This rest isn't idle time. Flour needs water to fully hydrate before gluten can form properly, and giving it a head start — before the starter or salt gets involved — means less folding is needed later to build the same strength. It's the difference between the dough doing some of the work on its own versus you doing all of it by hand.
6:45pm — Work in the starter and salt. Pour both over the rested dough and pinch it through with your fingers until it's evenly distributed. Loose and tacky is correct here, not a sign anything's off.
7:15pm to 9:15pm — Fold instead of knead. Four rounds of stretch-and-fold spaced 30 minutes apart. Each round: wet a hand, lift one edge of the dough, pull it upward, fold it toward the center, turn the bowl a quarter rotation, and repeat three more times around. After the fourth round, step away and let the dough work on its own.
If you'd rather skip the folding routine entirely on a busy week, the no-knead bread for beginners method uses a longer, hands-off rise instead — a useful comparison if you're deciding how much active time you actually want to commit to.
The long rise
The stretch between folding and shaping is bulk fermentation, and rushing it is where most dense loaves come from.
10pm to midnight — check the dough. Watch for it to swell by roughly a third to a half in size, feel airy rather than stiff when nudged, and show a scattering of bubbles near the top and along the sides. In a warm kitchen this stretch runs four to six hours from mixing. In a colder kitchen it can run past midnight — that's fine. It's easier to just let it go overnight and shape first thing in the morning than to chase an exact hour in the middle of the night.
Shaping and the cold rest
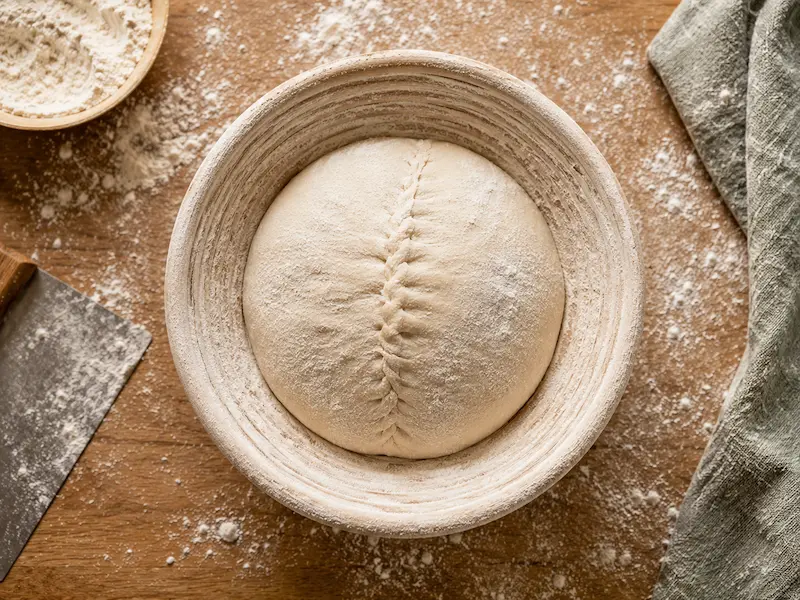
Once fermentation looks ready, tip the dough onto a lightly floured surface. Draw the outer edges toward the middle to form a rough ball, flip it seam-down, then drag it across the counter in small circles until the top feels taut. Set it seam-up into a floured banneton.
Cover and chill it 8 to 18 hours. A late-evening shape means it's ready to bake the following morning, no early alarm needed.
The cold isn't just about convenience. It slows the yeast down without stopping it, which lets the bacteria in the starter keep producing the acids that give sourdough its tang — that flavor develops more in a slow cold rise than in a fast warm one. The chill also firms the dough enough that a knife or blade can score it cleanly the next morning instead of dragging and tearing.
Baking
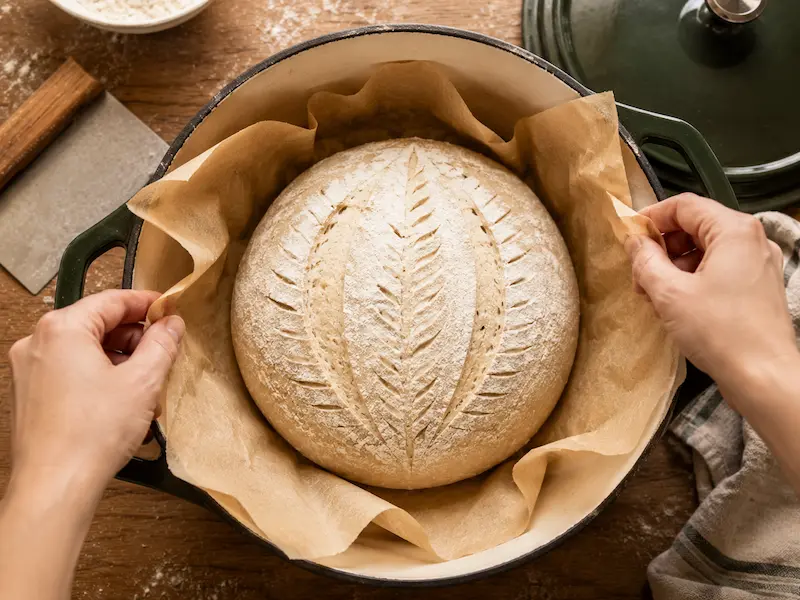
Around 9am, preheat the Dutch oven — empty, lid on — at 475°F for a full 30 minutes before the dough goes anywhere near it. Turn the chilled dough onto parchment. Score once, at a shallow angle, about half an inch deep. Lower it into the pot on its parchment, cover, and bake 20 minutes. Remove the lid and continue another 20 to 25 minutes, until the crust has gone deep brown, almost mahogany at the edges.
If the base is browning much faster than the top, slide a second empty baking sheet onto the rack directly below the Dutch oven — it blocks some of the direct bottom heat without affecting the rest of the bake. If the loaf looks done on the outside but feels underbaked in the center when you tap it (it should sound hollow), crack the oven door open and let it sit on the rack for a few extra minutes with residual heat rather than cranking the temperature back up.
The most important instruction in this guide: rest the loaf on a wire rack for at least an hour before slicing. Cutting early lets steam escape before the crumb finishes setting, which leaves the center looking gummy even in a properly baked loaf.
No Dutch oven? Here's the workaround
A heavy lidded pot — cast iron, enamel, stainless — does the same job. The lid traps steam during the first 20 minutes so the loaf can fully expand before the crust sets.
No lidded pot at all works too: bake on a hot stone or heavy tray and place a pan of boiling water on the oven floor for the first 20 minutes to generate steam manually.
For a method that skips the oven altogether, the stovetop sourdough guide uses a cast iron skillet and works on any hob.
Storing and freezing sourdough
Sourdough has no added preservatives, so it behaves differently than store-bought bread.
At room temperature: once fully cooled, keep the loaf cut-side down on a board, or in a paper bag, for up to 3 days. Sourdough's natural acidity means it actually stays good longer than most yeasted breads at room temp — but skip the plastic bag, which traps moisture and softens the crust.
Freezing: sourdough freezes well, whole or sliced. Slice first if you want to pull out single portions later, then wrap tightly in plastic and place in a freezer bag with the air pressed out. It keeps well for up to 3 months. Thaw at room temperature, or toast slices straight from frozen.
Refreshing a day-old loaf: a few minutes in a 350°F oven brings the crust back close to fresh. Avoid the fridge for storage — it actually speeds up staling compared to room temperature or the freezer.
Variations once the basic loaf is easy
Where loaves go wrong — and the fix for each
For anything not covered here, the dense sourdough troubleshooting guide covers ten separate causes in more depth.