A mason jar of bright red homemade easy kimchi on a wooden counter with napa cabbage gochugaru garlic and chopsticks beside it

Easy Kimchi Recipe: Bold, Crunchy, and Ready in 2 Days
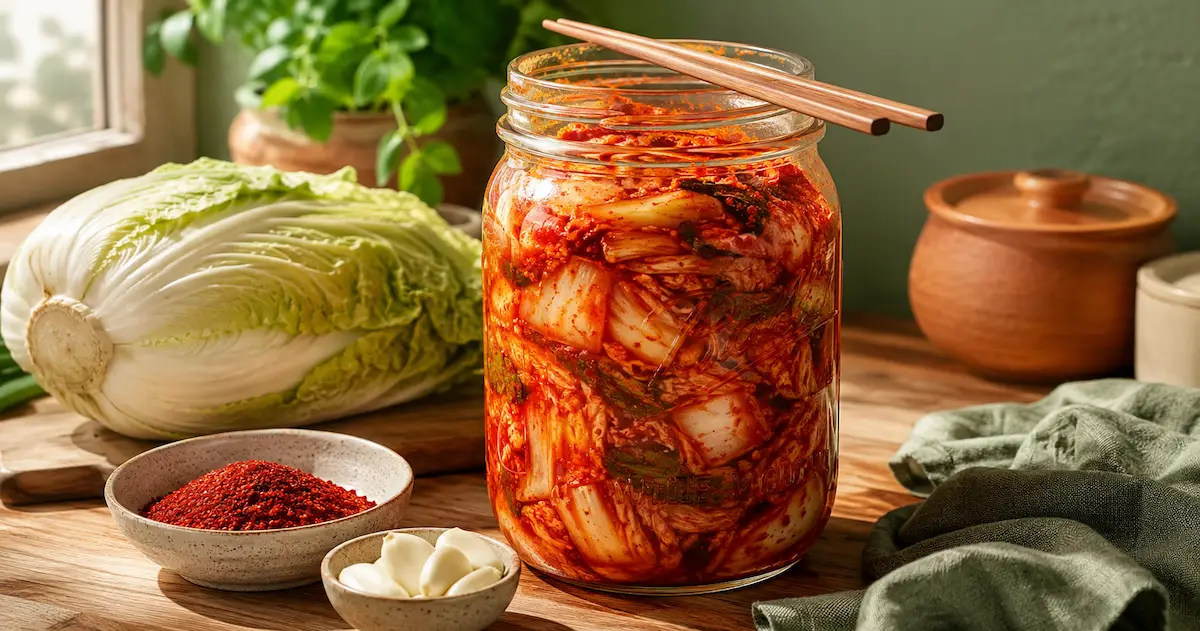
A mason jar of bright red homemade easy kimchi on a wooden counter with napa cabbage gochugaru garlic and chopsticks beside it

Kimchi is not complicated. It is salted cabbage, a spiced paste, and time — and the version in this guide skips fish sauce entirely without losing any of the bold, fermented depth that makes kimchi worth eating.

This easy kimchi recipe produces a small batch that fits in two quart mason jars — the right size for an apartment kitchen where you want to make kimchi regularly without committing to a five-gallon crock. You can eat it fresh the same day or let it ferment for two days at room temperature for the full tangy, fizzy, living version that earned kimchi its reputation as one of the most probiotic-rich foods on the planet.

The one ingredient you cannot substitute is gochugaru — Korean red pepper flakes. It is not interchangeable with regular chili flakes or cayenne. It is milder, fruitier, and deeper in colour. Find it at any Asian grocery store or order it online. Everything else in this easy kimchi recipe is a standard supermarket shop.

What Goes Into This Homemade Kimchi
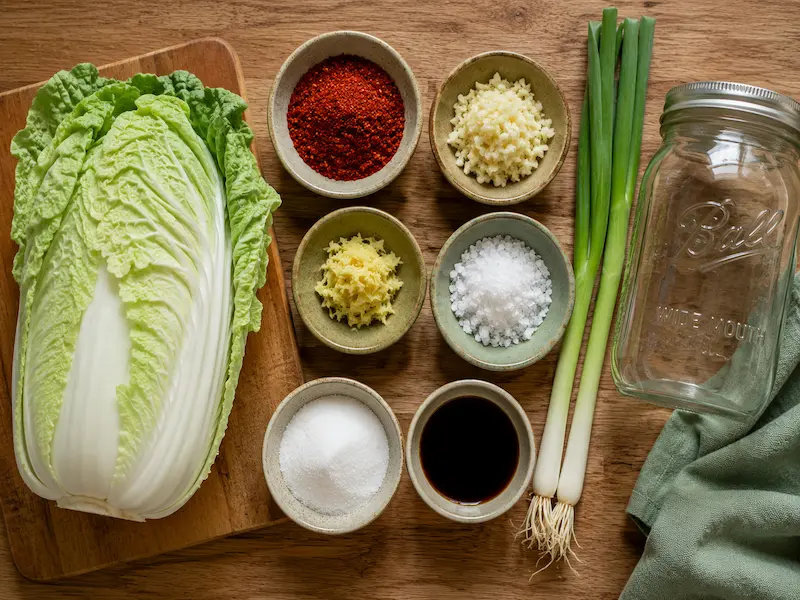
Easy kimchi recipe ingredients flat lay including napa cabbage gochugaru flakes garlic ginger sea salt soy sauce and spring onions on a wooden surface

The cabbage and salt — this is where kimchi actually starts

One medium head of napa cabbage (about 1kg / 2.2 lbs) cut into rough 2-inch pieces. Non-iodised sea salt — about 2 tablespoons. Iodised table salt inhibits the fermentation bacteria and should never be used in any ferment. The salt draws water out of the cabbage through osmosis, softening it and creating the brine the bacteria will later thrive in.

The paste

  • 4 tbsp gochugaru — Korean red pepper flakes, not regular chili flakes
  • 6 cloves garlic — minced or grated
  • 1 tsp fresh ginger — grated
  • 1 tbsp soy sauce — replaces fish sauce, adds the umami depth
  • 1 tsp sugar — or half a grated apple, which also feeds the fermentation
  • 3 spring onions — cut into 2-inch pieces
  • Optional: 1 small carrot — julienned, adds colour and crunch

On the gochugaru substitution question: There is none that works properly. Regular chili flakes make the kimchi too sharp and the wrong colour. Smoked paprika produces a completely different flavour. If you cannot find gochugaru locally, order it online — it keeps for months in a sealed jar in the freezer and is the single ingredient that makes this taste like kimchi rather than spiced cabbage.

The Method — What Actually Happens and Why

Traditional kimchi recipes make this sound more complicated than it is. There are really only three stages: salt the cabbage, make the paste, combine and ferment. Each one takes almost no skill — just patience.

Stage 1 — Salt the cabbage (2 hours, almost entirely hands-off)

Cut the cabbage into rough 2-inch pieces and place in a large bowl. Sprinkle the salt over and toss to coat. Massage the salt into the leaves for about 2 minutes then leave for 30 minutes. Toss again, leave for another 30 minutes. Repeat twice more — total salting time is about 1.5 to 2 hours. The cabbage is ready when a piece bends without snapping. This tells you the cell walls have broken down enough to absorb the paste and begin fermenting properly.

Rinse the salted cabbage under cold water three times, squeezing firmly each time to remove excess water. Taste a small piece — it should be pleasantly salty, not overwhelming. If it is too salty, rinse once more and squeeze again.

Why the salting step matters

Salting is not just about flavour. It pulls water out of the cabbage to create a naturally salty, slightly acidic environment that suppresses harmful bacteria while allowing the lactic acid bacteria — the ones you want — to thrive. Skip or rush this step and your easy kimchi recipe will be soft, wet, and far less flavourful.

Stage 2 — Make the paste (5 minutes)

Combine the gochugaru, garlic, ginger, soy sauce, and sugar in a bowl and mix into a thick paste. If it seems too dry, add a tablespoon of water. The paste should be spreadable but not runny. Taste it — it will be intensely spicy, salty, and garlicky at this stage. That is correct. The flavours mellow significantly during fermentation.

Stage 3 — Combine (5 minutes)

Add the drained cabbage, spring onions, and carrot if using to the paste bowl. Using your hands — wear gloves, gochugaru stains skin and nails — toss everything together until every piece of cabbage is evenly coated in the red paste. Pack the mixture tightly into two clean quart mason jars, pressing down firmly as you go. You should see brine rising to cover the vegetables as you press. Leave about an inch of headspace at the top — the kimchi will expand as it ferments.

The Fermentation Timeline
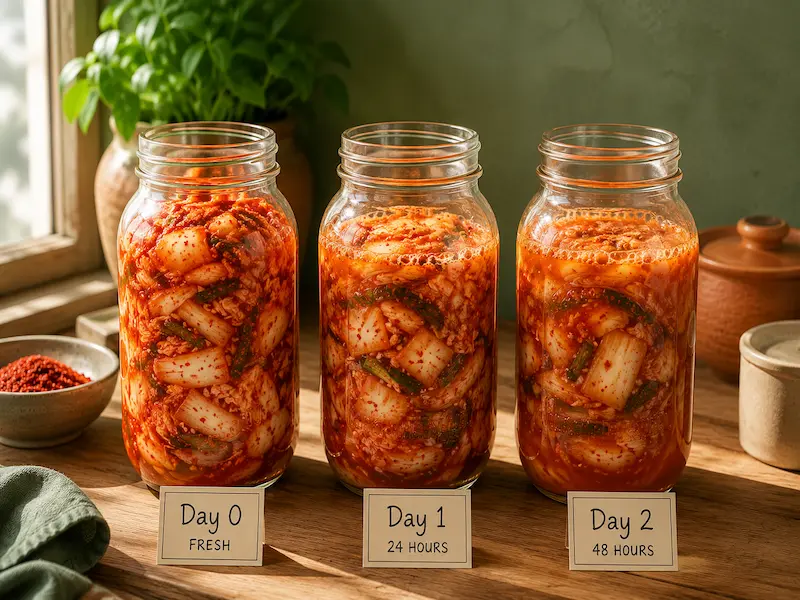
Three mason jars of kimchi at different fermentation stages labelled Day 0 Day 1 and Day 2 showing colour change on a wooden counter

This is where most beginner guides are vague. Here is exactly what to expect day by day:

Day 0 — Just packed

Bright red, very spicy, very garlicky, crunchy. This is fresh kimchi — excellent served immediately as a side dish or condiment. Some people prefer it at this stage.

Day 1 — First signs of fermentation

Leave the jars at room temperature with lids on but not fully tightened — gas needs to escape. Press the cabbage down below the brine once in the morning and once in the evening. Small bubbles may appear. The smell will intensify — tangy, garlicky, slightly funky. This is fermentation working.

Day 2 — Ready to refrigerate

Taste a piece. If it has developed a noticeable tang and a slight fizz on the tongue, it is ready. Move both jars to the fridge. The cold temperature slows fermentation dramatically — kimchi will continue developing flavour in the fridge but at a fraction of the speed.

Week 1–2 — Peak flavour

Most people find this the best eating window — tangy, fizzy, still crunchy. Use it as a side dish, add it to fried rice, layer it in sandwiches, or eat it straight from the jar.

Month 1+ — Aged kimchi

More sour, softer texture, much more complex flavour. Aged kimchi is traditionally used in cooked dishes — kimchi jjigae (stew), kimchi fried rice, and kimchi pancakes — where the sourness becomes an asset rather than an overpowering edge.

Quick Troubleshooting Cheat Sheet

ProblemCauseFix
Too saltyNot rinsed enough after saltingRinse briefly under cold water before eating — do not rinse the whole jar
Too softOver-fermented or over-saltedMove to fridge immediately — use soft kimchi in cooked dishes
Not tangy after 2 daysKitchen too cold or cabbage too wetLeave 1 more day at room temperature — taste again
White film on surfaceKahm yeast — same as sauerkrautSkim off and move to fridge — not dangerous
Very fizzy or overflowingFermenting too fast — room too warmMove to fridge early — still safe to eat
Too spicyToo much gochugaruReduce to 2 tbsp next batch — serve with rice to balance heat
Too Salty
CauseNot rinsed enough after salting
FixRinse briefly before eating — not the whole jar
Too Soft
CauseOver-fermented or over-salted
FixMove to fridge — use in cooked dishes
Not Tangy After 2 Days
CauseKitchen too cold or cabbage too wet
FixLeave 1 more day — taste again
White Film on Surface
CauseKahm yeast — same as sauerkraut
FixSkim off and move to fridge — safe
Too Fizzy or Overflowing
CauseFermenting too fast — room too warm
Move to fridge early — still safe
Too Spicy
CauseToo much gochugaru
FixReduce to 2 tbsp next batch — serve with rice

6 Ways to Use Your Homemade Kimchi

Once your easy kimchi recipe is ready, most people eat the first jar straight as a side dish — which is exactly right. But kimchi is also one of the most versatile fermented foods in any kitchen:

  • Kimchi fried rice — chop aged kimchi finely and fry with leftover rice, a splash of soy sauce, and a fried egg on top
  • Kimchi grilled cheese — layer drained kimchi inside a cheese toastie for one of the best sandwiches you will ever make
  • Kimchi scrambled eggs — stir a tablespoon of chopped kimchi into eggs just before they set
  • Kimchi noodles — toss ramen or soba noodles with kimchi, sesame oil, and a soft-boiled egg
  • Kimchi pancakes (kimchijeon) — chop kimchi roughly and fold into a simple flour-and-water batter, pan-fry until crispy — similar skill set to sourdough discard pancakes
  • Straight from the jar — the most honest way to judge your homemade kimchi

Frequently Asked Questions

How long does homemade kimchi last in the fridge?

Properly packed homemade kimchi kept submerged in its brine lasts 3 to 6 months in the fridge — and often longer. The flavour changes over time, becoming more sour and complex, but it remains safe and edible indefinitely as long as it smells tangy rather than rotten and shows no coloured mould growth.

Is this easy kimchi recipe authentic?

It is a simplified apartment-friendly adaptation of mak kimchi — the everyday quick-chop style rather than traditional whole-leaf baechu kimchi. The method and fermentation science are authentic. The fish sauce is replaced with soy sauce, which is also used in traditional Buddhist temple kimchi and produces a genuinely delicious result.

Can I make this kimchi less spicy?

Yes — reduce the gochugaru to 2 tablespoons for a milder result. For a non-spicy white kimchi (baek kimchi), omit the gochugaru entirely and add a little extra garlic, ginger, and a small amount of Asian pear or apple for sweetness. It ferments the same way and tastes completely different — mild, clean, and lightly sweet.

Do I need special kimchi containers?

No. Standard wide-mouth quart mason jars are ideal for a small batch easy kimchi recipe — they are airtight, glass, and the right size. Traditional Korean onggi pottery crocks are beautiful but completely unnecessary for an apartment kitchen batch. The only thing that matters is that the container is glass or food-safe plastic and can be sealed.

How is kimchi different from sauerkraut?

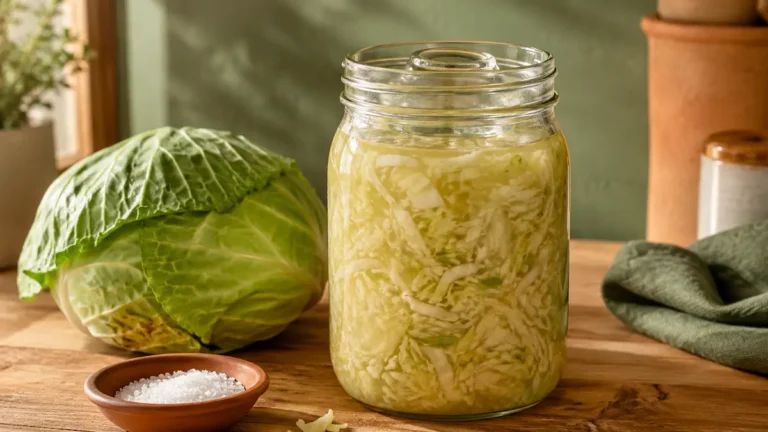
Both are lacto-fermented vegetables using the same biological process — salt suppresses harmful bacteria, lactic acid bacteria produce the tang and preservation. The difference is the vegetables, spices, and fermentation time. Sauerkraut uses only cabbage and salt and takes 1 to 4 weeks. Kimchi uses cabbage, gochugaru, garlic, ginger, and spring onions, and is ready in 2 days. Both are excellent starting points for apartment fermentation. If you have already tried our sauerkraut recipe, this easy kimchi recipe uses the same core skills with a completely different flavour result.

Keep Fermenting

🥬

Try sauerkraut too

Same fermentation process, completely different flavour. Just cabbage and salt — ready in 1 to 4 weeks.

Sauerkraut Recipe →
💧

Make water kefir

A fizzy dairy-free probiotic drink ready in 48 hours — the easiest fermented drink in apartment homesteading.

Water Kefir Recipe →
🍎

Apple cider vinegar from scraps

Turn apple peels and cores into raw living vinegar for almost zero cost — a 6-week zero waste ferment.

Apple Cider Vinegar Guide →
🍵

Round out your ferment lineup

Longer wait than the others here (7-14 days) but a bigger flavour payoff — kombucha is the natural next ferment.

Kombucha Guide →
🌱

The full fermentation picture

Fermentation is one of six apartment homesteading skill areas — see how they all connect.

Apartment Homesteading Guide →

Similar Posts

Leave a Reply

Your email address will not be published. Required fields are marked *