Growing Mushrooms at Home: A Beginner’s Guide to Your First Harvest
Growing mushrooms at home solves a problem apartment growers run into with almost everything else: mushrooms don’t need sunlight, soil, or a balcony. They grow in a closet, under a sink, or on a kitchen counter, using nothing but a substrate, humidity, and a bit of fresh air. That makes them one of the few “growing your own food” projects that works just as well in a windowless apartment as it does in a garden.
One clarification worth making up front: everything in this guide covers edible, gourmet culinary species — oyster, lion’s mane, shiitake, and similar. It has nothing to do with psychoactive mushroom cultivation, which involves different species, different legal considerations depending on where you live, and isn’t something this guide addresses.
Picking a Species That Matches Your Patience Level
Not all mushrooms make sense as a first grow. Species differ enough in colonization speed, temperature tolerance, and forgiveness of imperfect conditions that picking the wrong one for your first attempt is a common reason beginners give up before their first harvest. Most beginner kits for any of these three species run roughly $20-35, making this one of the lower-cost ways to test whether a growing project is worth continuing before investing further.
| Species | Difficulty | Time to First Harvest | Notes |
|---|---|---|---|
| Oyster mushroom | Easiest | 10–14 days from a pre-colonized kit | Tolerates a wide temperature range and inconsistent fresh air better than most species; the standard beginner recommendation |
| Lion’s mane | Easy to moderate | 2–3 weeks from a kit | More sensitive to CO2 buildup than oysters, so fresh air exchange matters more |
| Shiitake | Intermediate | 30–60 days to colonize a hardwood block before fruiting even starts | Wants a denser substrate and typically needs a cold-water soak or temperature drop to trigger pinning |
If this is your first attempt at growing mushrooms at home, oyster mushrooms are the reasonable default — not because the others are impractical, but because oysters give you a working mental model of the whole process in under two weeks, which makes troubleshooting a slower species like shiitake much less confusing later.
The Four Stages Every Grow Passes Through
Regardless of species or setup, every mushroom grow moves through the same four stages, and knowing where you are in that sequence tells you what to actually watch for.
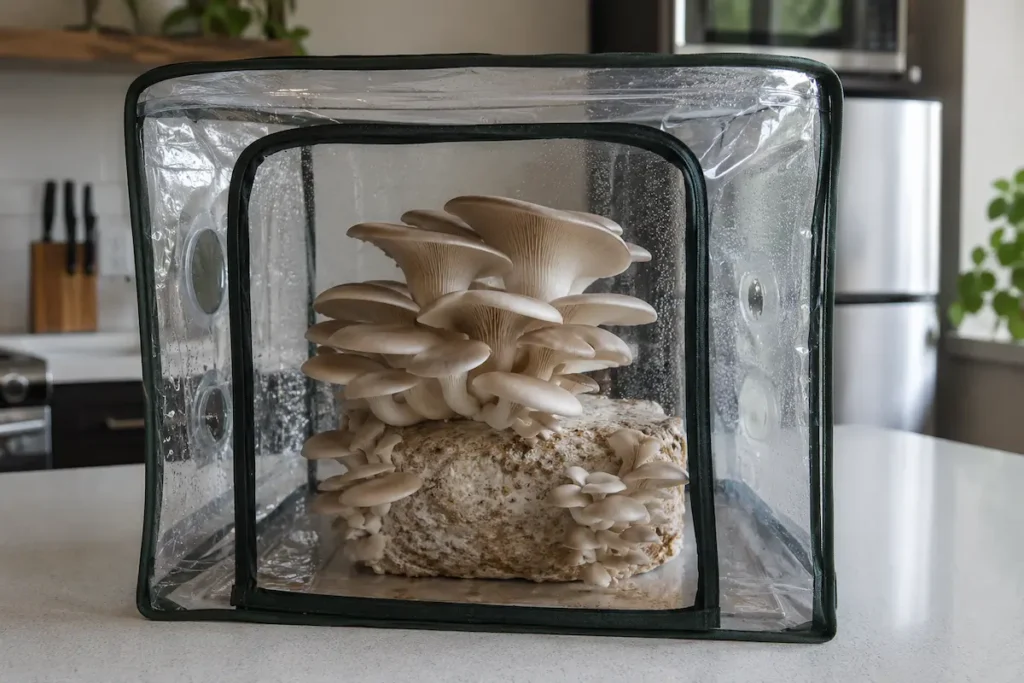
- Colonization. The mycelium — a network of white, thread-like fungal growth — spreads through the substrate, consuming it as food. This stage happens in the dark and doesn’t need misting; it needs stable warmth and time. Target roughly 70-80°F during colonization and 55-75°F during fruiting for most oyster strains — comfortably within normal room temperature for most apartments, which is part of why oysters don’t need a dedicated heat mat or cooling setup the way some other cultivation projects do. A pre-colonized kit skips most of this stage for you, since the mycelium has already fully grown through the substrate before it reaches you.
- Pinning. Once the substrate is fully colonized, small mushroom “pins” begin forming at the surface, usually triggered by exposure to fresh air, light, and a humidity increase. This is when most kits instruct you to cut an X into the bag or open ventilation holes.
- Fruiting. Pins rapidly develop into full mushrooms over the following days. This is the stage that needs consistent high humidity and gentle air exchange — the balance covered in the next section.
- Flushing. After harvest, a well-maintained substrate often produces a second and sometimes third “flush” of mushrooms over the following weeks, though each flush is typically smaller than the last as the substrate’s stored energy depletes.
The Humidity-and-Airflow Balance That Actually Determines Success
This is where most beginner grows stall, and it comes down to a genuine tension: mushrooms need very high humidity to fruit properly, but they also need fresh air exchange to avoid a CO2 buildup that stunts growth or distorts the mushrooms. Getting one right while ignoring the other is a common beginner mistake.
- Target 80–90% relative humidity during the fruiting stage for most species — noticeably higher than what feels comfortable in a normal living space.
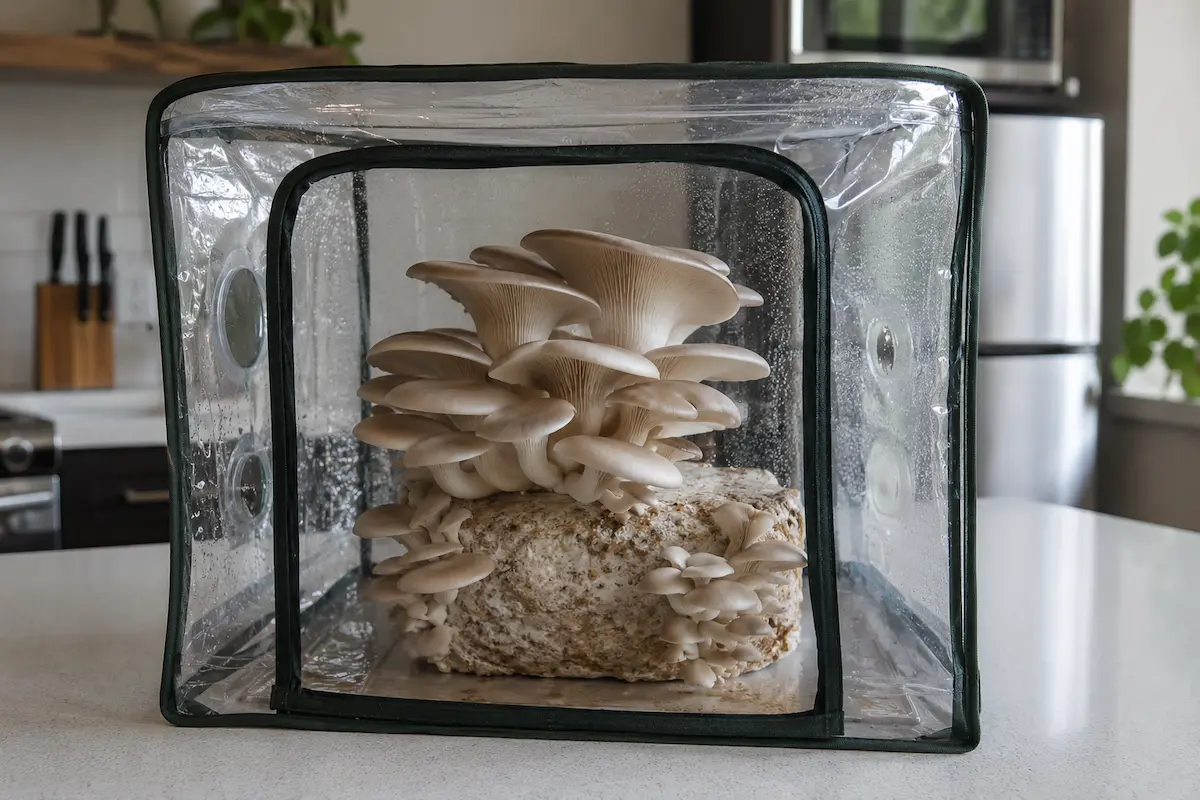
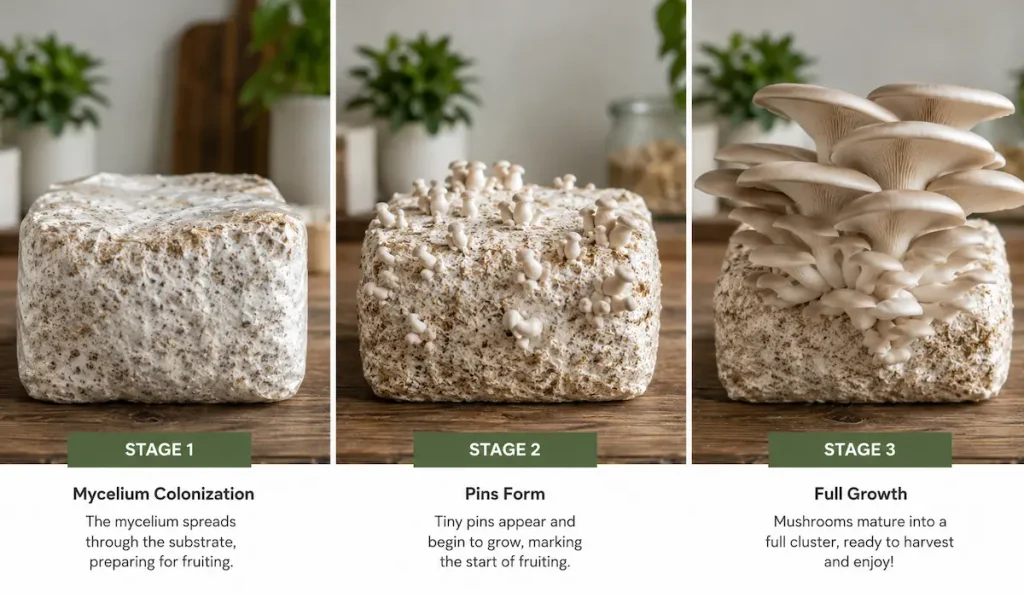
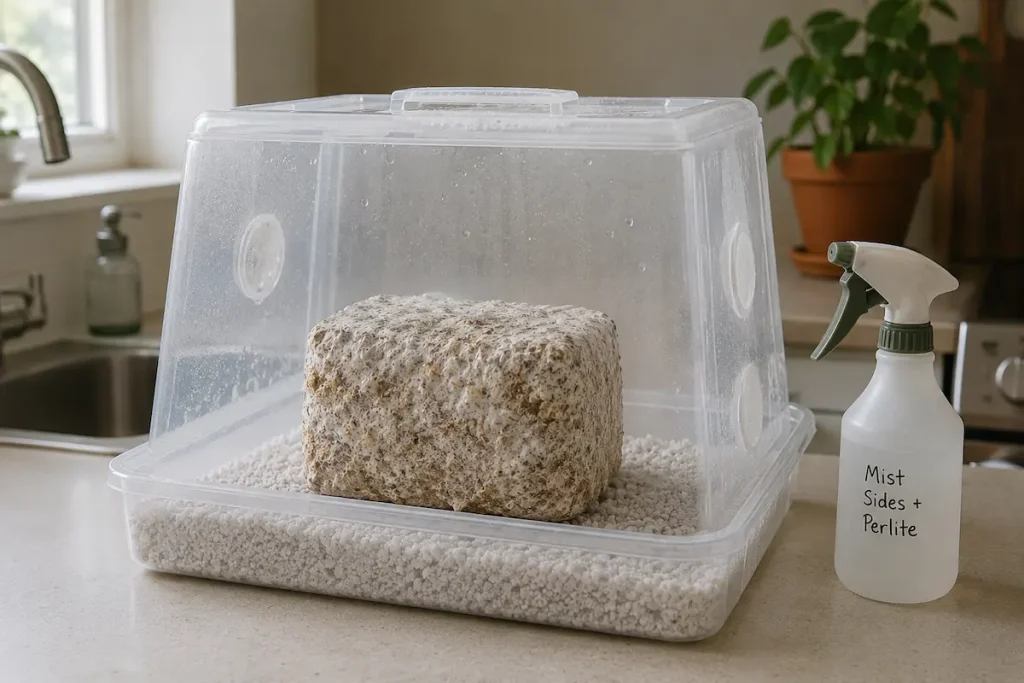
- A simple humidity tent works for small grows: a clear plastic tote turned upside down over the substrate, or a dedicated grow tent, with wet perlite in the base to hold moisture and a spray bottle for misting the walls and perlite — not the mushrooms directly — two to three times a day. If your tap water is heavily chlorinated, letting it sit uncovered for a few hours before misting — or using filtered water — can make a modest difference, since chlorine can slow the mycelium at the surface. It’s a minor optimization, not a requirement.
- Fresh air doesn’t mean constant airflow — fanning the growing area by hand a few times a day, or briefly opening the tent, is usually enough to prevent CO2 buildup without crashing your humidity.
- Light matters more than people expect. Mushrooms don’t photosynthesize, but they do use light as a cue for where and when to fruit. A few hours of indirect daylight or a simple LED on a normal day/night cycle is enough — avoid direct sun, which dries out the substrate faster than misting can keep up with.
- Watch the mushrooms themselves for feedback. Long, thin stems with unusually small caps — a condition growers call “legginess” — is the textbook sign of too little fresh air exchange, not a humidity problem. A substrate surface drying out between mistings, on the other hand, usually points to too little humidity or too much direct airflow across it.
Reading Your Grow: Healthy Mycelium vs. a Contamination Problem
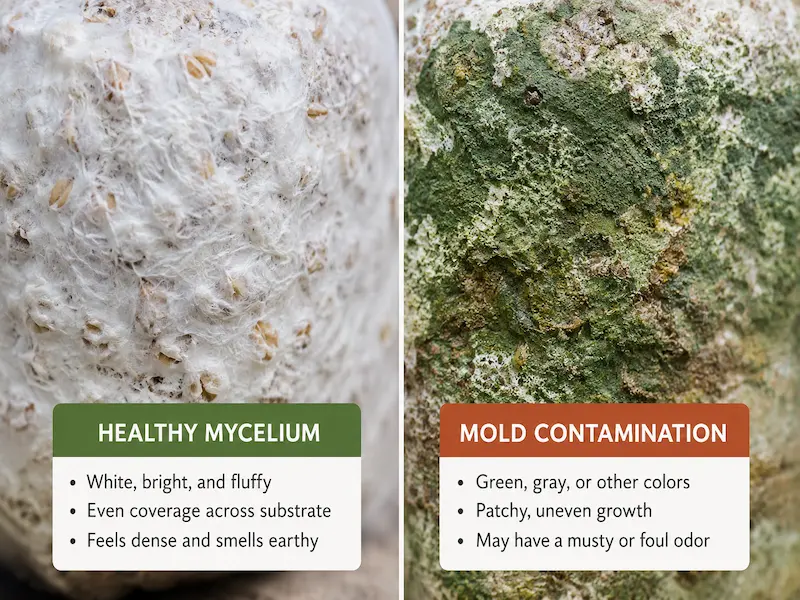
Cultivated mushroom mycelium is white, dense, and grows in a rope-like or cottony pattern, and it should smell neutral to mildly earthy — not unlike the smell of fresh mushrooms in a grocery store. Contamination is the main risk in any home mushroom grow, and it’s worth knowing the difference before you start rather than discovering it mid-grow.
- Green, black, or brightly colored fuzzy patches on the substrate are a contaminating mold (most often a fast-spreading type called Trichoderma), not part of a normal grow. These typically start as small white spots before turning color as they mature, and the affected section — or the whole block, depending on how far it’s spread — should be discarded rather than eaten around.
- A sour, sharply unpleasant, or ammonia-like smell signals bacterial or mold contamination, distinct from the mild earthy smell of healthy mycelium — and often shows up before any visible discoloration does.
- One mold in particular is genuinely easy to mistake for healthy growth: cobweb mold, which is also whitish and fluffy. The giveaway is that it’s grayer, thinner-stranded, and noticeably wispier than true mycelium, and it tends to grow upward in a raised, three-dimensional way rather than spreading flat and rope-like across the substrate surface.
- Slow or stalled colonization with no green, black, or gray growth isn’t necessarily contamination — it can simply mean the substrate is too cool or too dry, which is a conditions problem rather than a spoilage one.
As with any home-grown food, only eat mushrooms you’ve deliberately cultivated from a known, reputable spawn or kit source — never mushrooms foraged or self-identified from the wild, where misidentification carries serious poisoning risk that has nothing to do with the cultivation process described here.
Harvesting and Getting a Second Flush
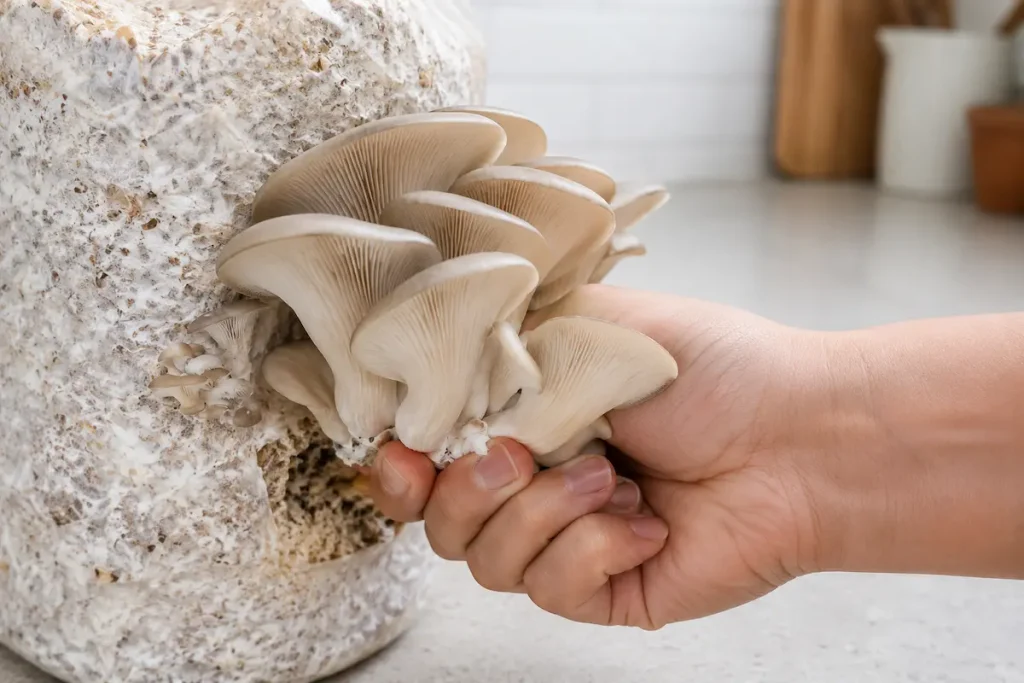
Harvest a cluster when the caps have flattened out and just before the edges start to thin or curl upward — waiting too long past this point makes the mushrooms tougher and can reduce the strength of the next flush. Twist gently or cut the whole cluster close to its base rather than pulling individual mushrooms out, which can damage the surrounding mycelium and hurt future flushes.
After harvest, let the substrate rest for a day or two with reduced misting (some growers soak the block for 12-24 hours instead) before resuming the full fruiting routine — this rest period is part of what triggers the next flush rather than an immediate one. Most home grows produce two to three flushes total before the substrate’s available energy is used up, at which point the spent block is done producing but isn’t wasted.
What to Do With Spent Substrate
Once a substrate block stops producing, it’s already partially broken-down organic material — which makes it a genuinely useful compost input rather than something to throw out. If you’re running a worm composting bin, spent mushroom substrate can go in with your other browns in small amounts, since the mycelium has already done some of the decomposition work for the worms — add it gradually rather than all at once, since a sudden large addition can overheat a small apartment-sized bin. It also works in general apartment composting setups the same way.
Frequently Asked Questions
Do I need a kit to grow mushrooms at home, or can I start from scratch?
A pre-colonized kit is the far more reliable starting point for a first grow, since it skips the colonization stage — the part with the highest contamination risk — and gets you straight to fruiting. Growing from raw grain spawn and substrate is possible but takes considerably longer and carries meaningfully more risk of a failed or contaminated grow.
How much space does a home mushroom grow actually need?
Very little — a kitchen counter corner, a closet shelf, or a spot in a bathroom (which tends to run more humid naturally) is enough space for a standard kit or small tent setup. This is part of what makes mushrooms a practical apartment homesteading project compared to something that needs a balcony or windowsill.
Will growing mushrooms at home make my apartment smell, or create a mess a landlord would notice?
Not under normal conditions. Healthy mushroom cultivation has a mild, earthy smell most people don’t notice beyond a foot or two from the setup, and a contained humidity tent keeps misting water off surfaces. The reversibility habits covered in our homesteading for renters guide — trays, containment, and cleaning up promptly — apply just as well here as they do to any other apartment growing project.
Why did my mushrooms grow long stems with tiny caps?
This shape, known as “legginess,” points to insufficient fresh air exchange during fruiting — the mushroom is essentially stretching to find lower CO2 levels. Increasing ventilation frequency without dropping humidity too far usually corrects it on the next flush.
Can I reuse a grow bag or container after a substrate is fully spent?
Once a substrate has given its flushes and stops producing, the bag or container itself can be cleaned and reused for a new grow, but the spent substrate should be composted rather than reused, since its available nutrients are largely depleted.
Where to Go From Here
If you’re building out other growing projects in a small space, our windowsill herb garden guide and how to grow garlic in a pot cover two other low-space growing methods that pair well with a mushroom setup, since none of the three compete for the same counter or windowsill space. And if this is your first apartment-based growing project of any kind, the complete guide to apartment homesteading covers where growing fits alongside the site’s other core practice areas.